
How to setup and edit recruitment details
Recruitment setup differs slightly based on the type of project you choose to create (using methinks Thinkers versus using your users). Find below how to set up and edit recruitment details referent to the different types of research projects.
Projects where screening is required
Note: screening is always required for projects using methinks Thinkers.
In the recruitment section of your project builder input the recruitment details for your research project. Learn more about setting up a project with methinks Thinkers.
Step 1: Recruit title and description
Click to enter a title and description for this recruit. Thinkers will see this information when applying to gigs through their Thinker app, so make sure you add relevant and informative details about your project.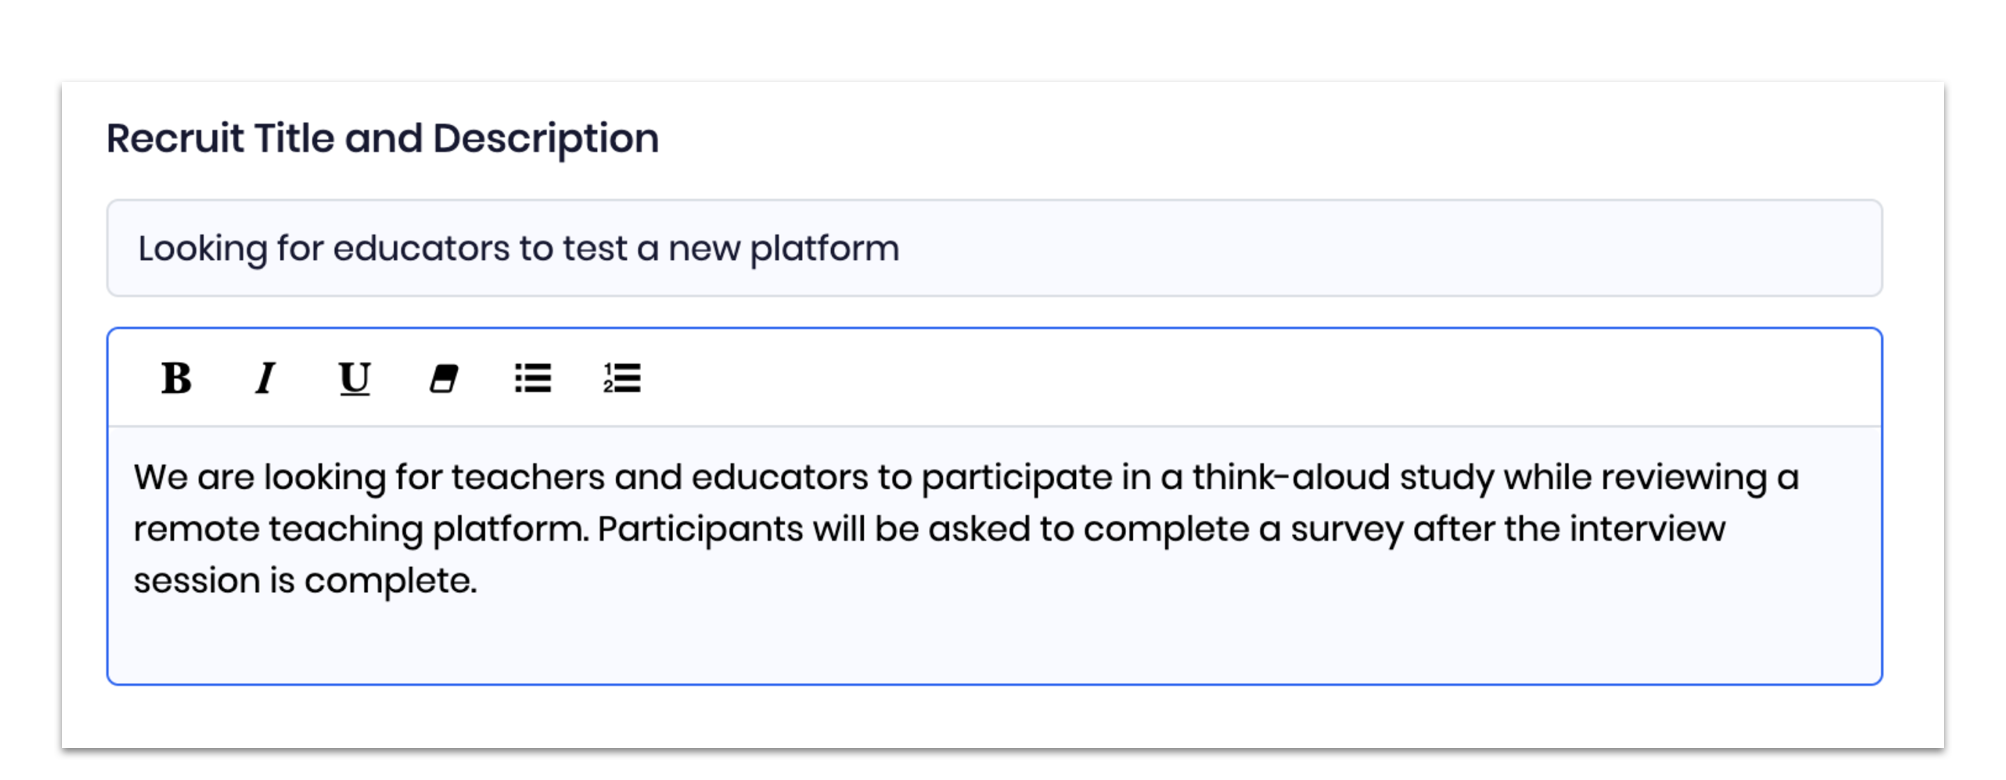
Pro tip: hover over the text editor icons to read the function of each icon.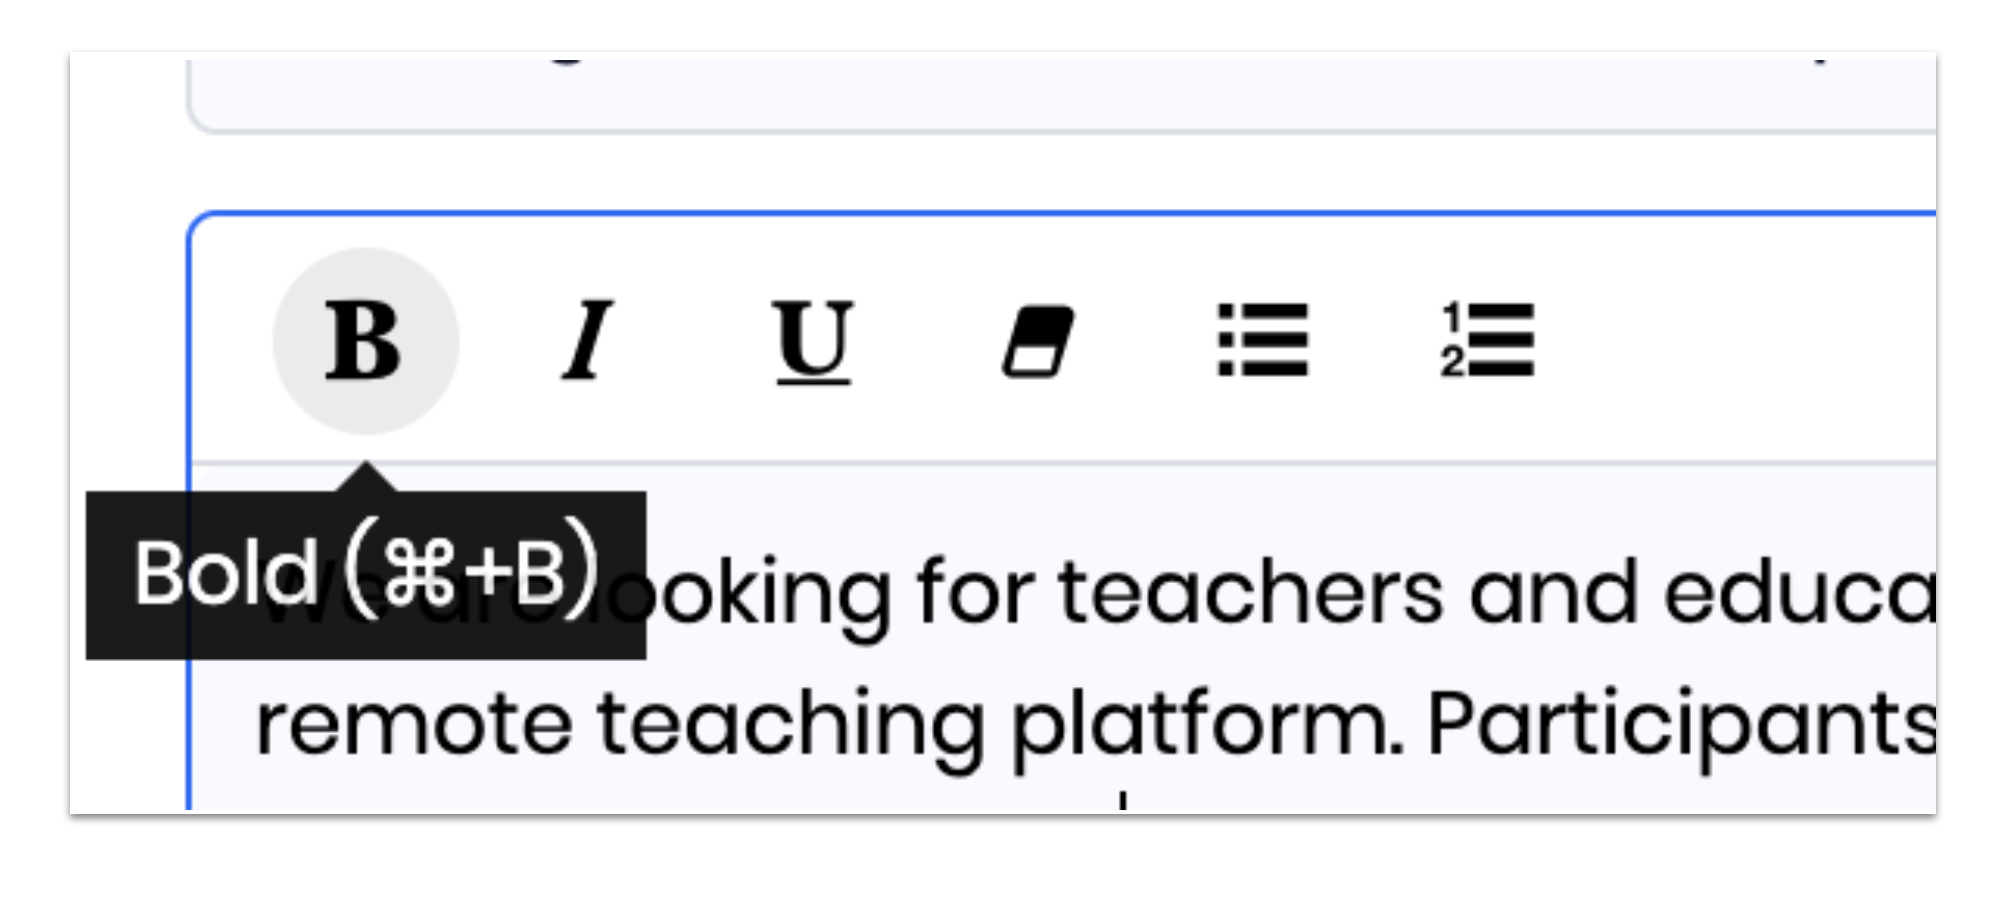
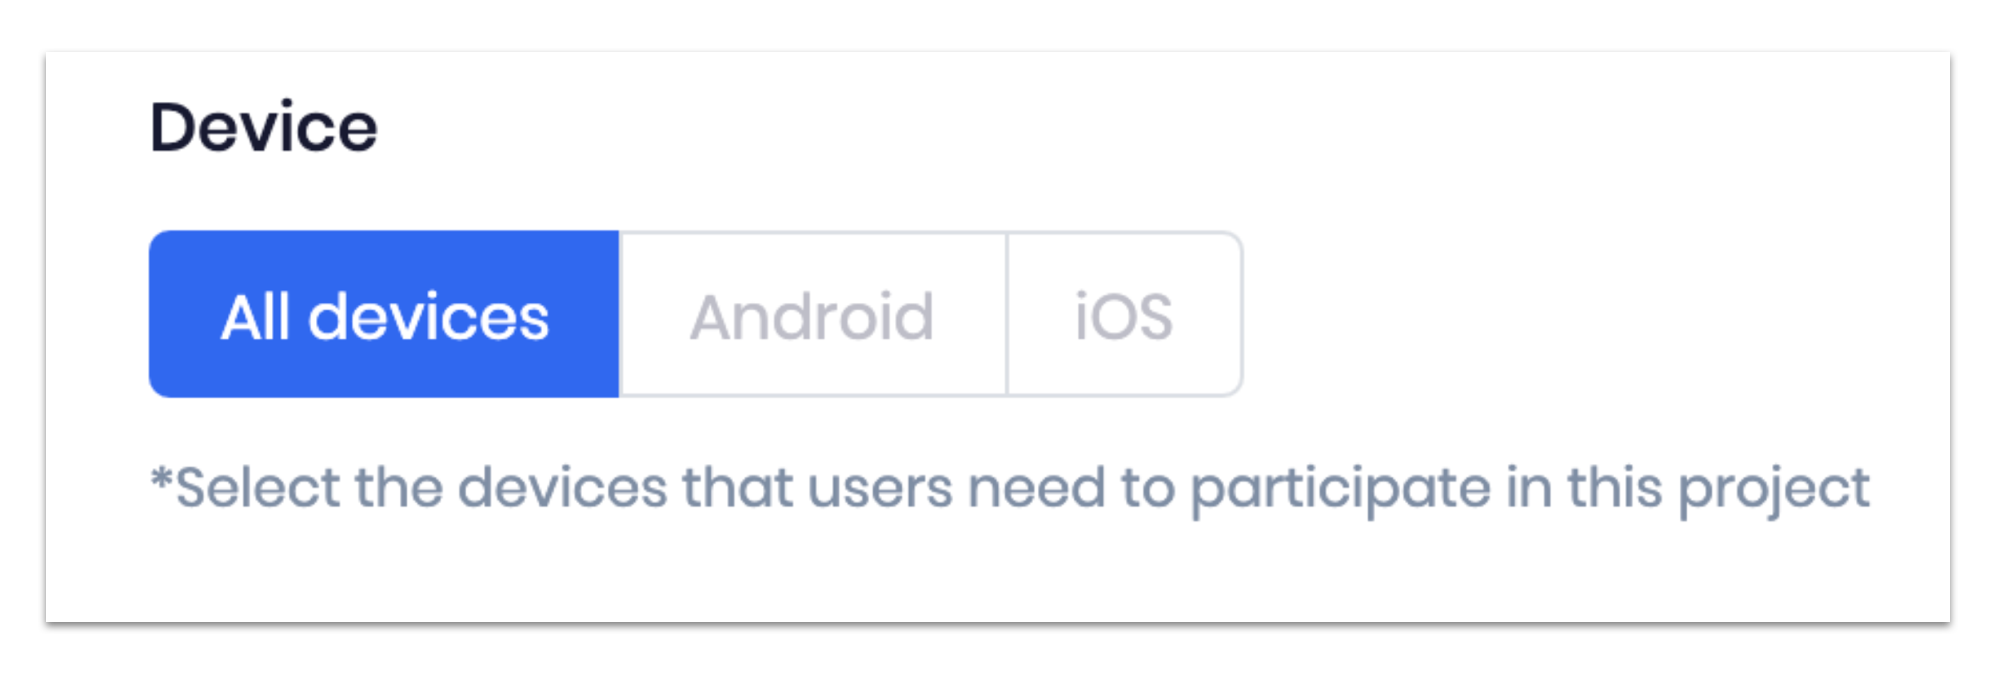
Step 2: Devices
Select the devices that users need in order to participate in your research project.
Step 3: Recruitment criteria
Use this section to define your target audience.
Select General Population to recruit users without any specific characteristics or select Define your target user criteria to specify the characteristics that you are looking for in a participant.
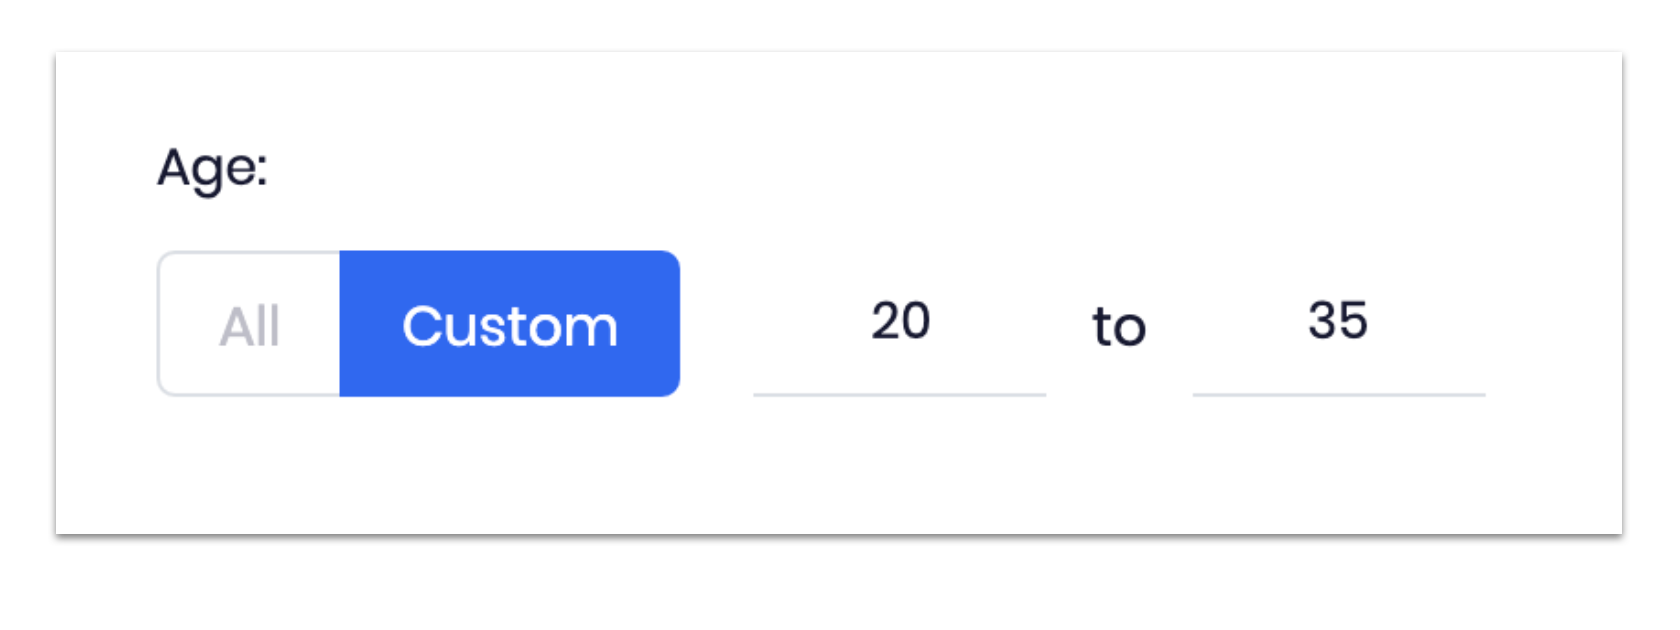
- Age: select all age groups or a custom age range for your recruitment.
To set a custom range:
- Click on Custom.
- Input the age number.
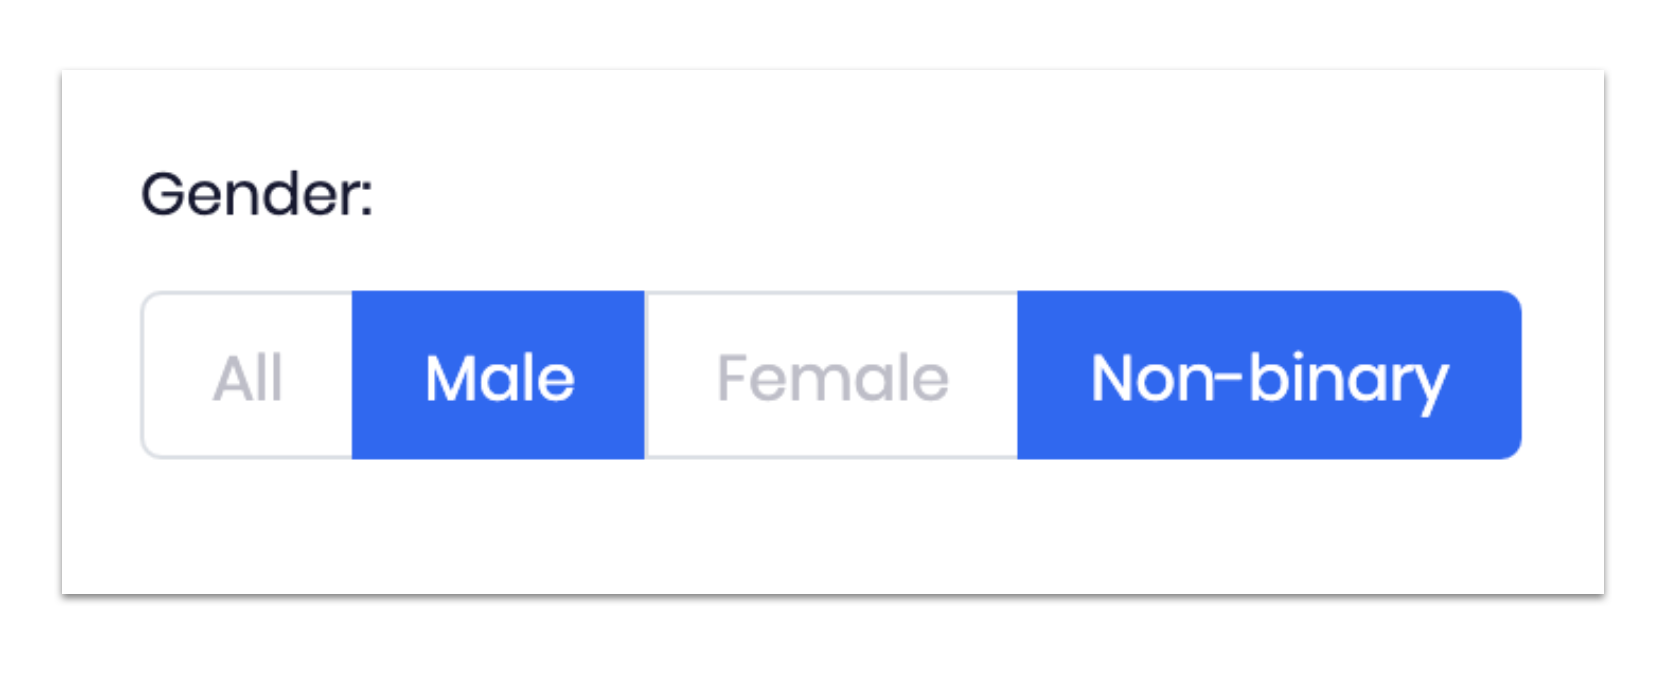
- Gender: choose between male, female, and non-binary.
To select:
- Click on the options that best fit your recruitment criteria.
- Country: click to select the country where your participants should be located in.
1. To select: click on + Select and click on the drop-down menu button and select from the menu options.
Step 4: Finalize setting up your project
After adding your recruitment details, continue by adding the remaining research project details. Learn more about each section when setting up your project.
Step 5: Start recruiting
Once your research project has been approved, you will be able to access your methinks dashboard with all tooling required for running your project.
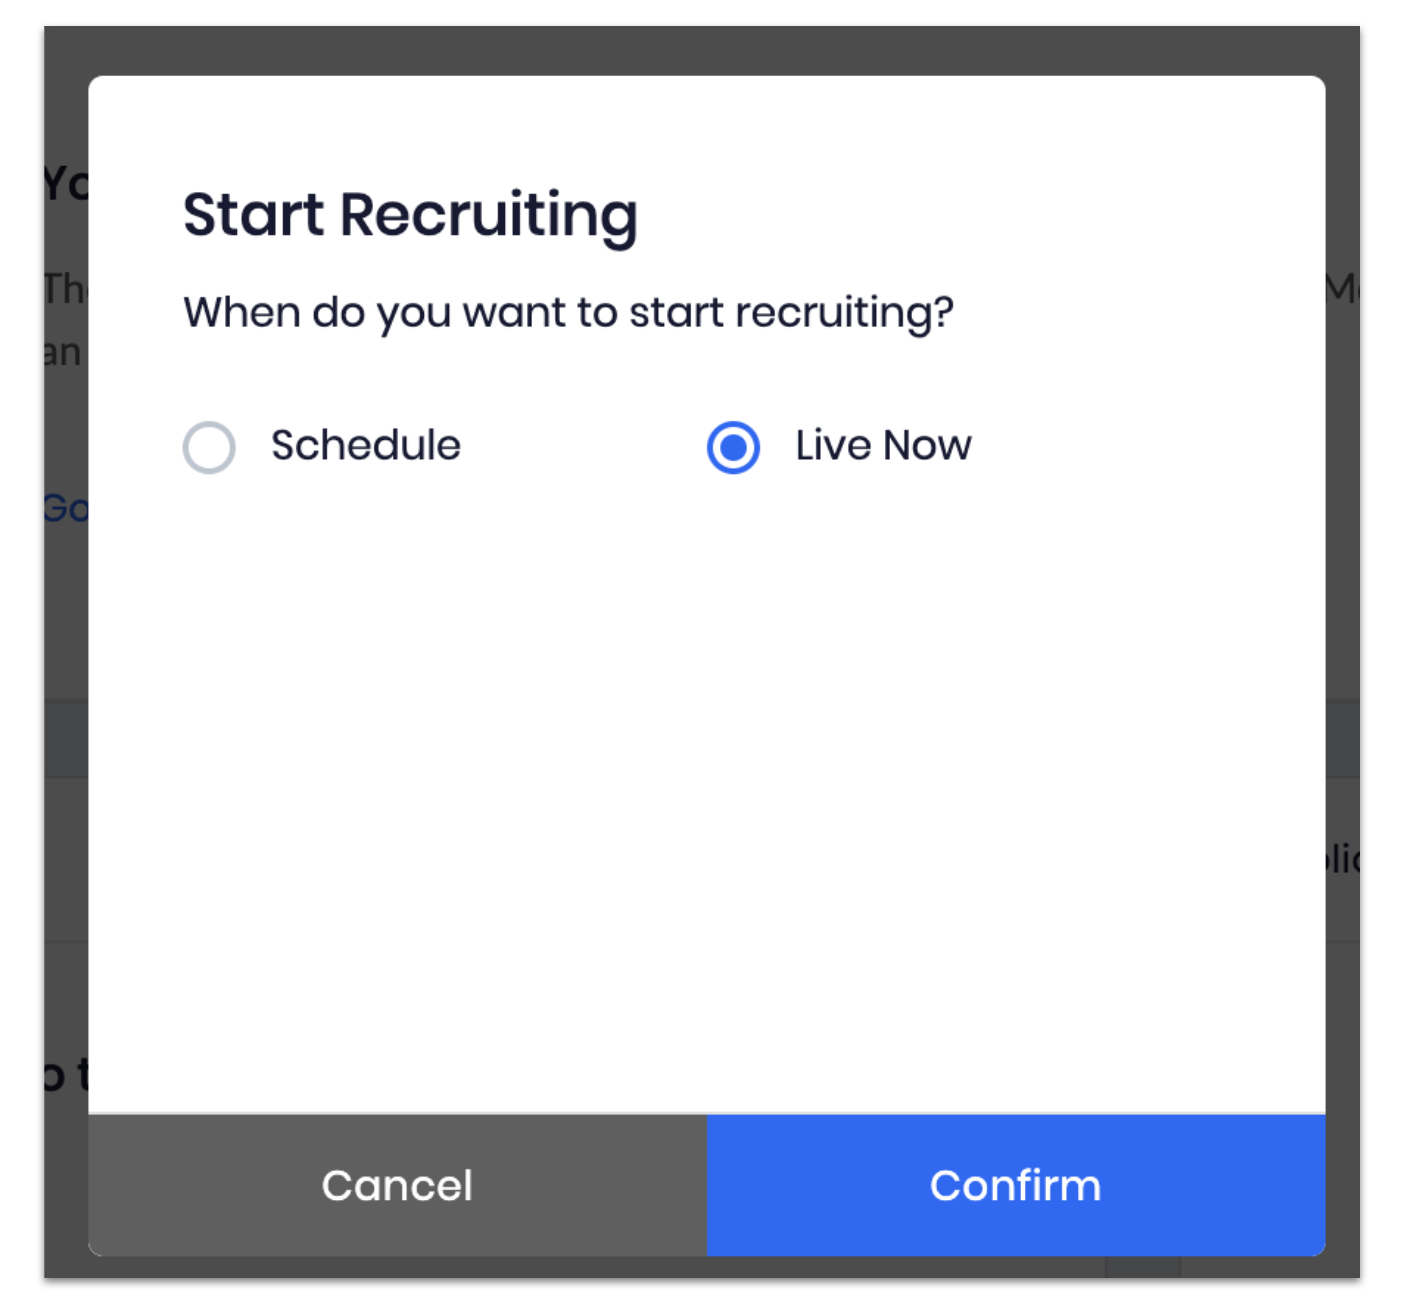
- To start recruiting:
- Click on the Start Recruiting button located on the dashboard's Home page or the Recruitment / Settings page.

- Choose to start recruiting now or sometime in the future.
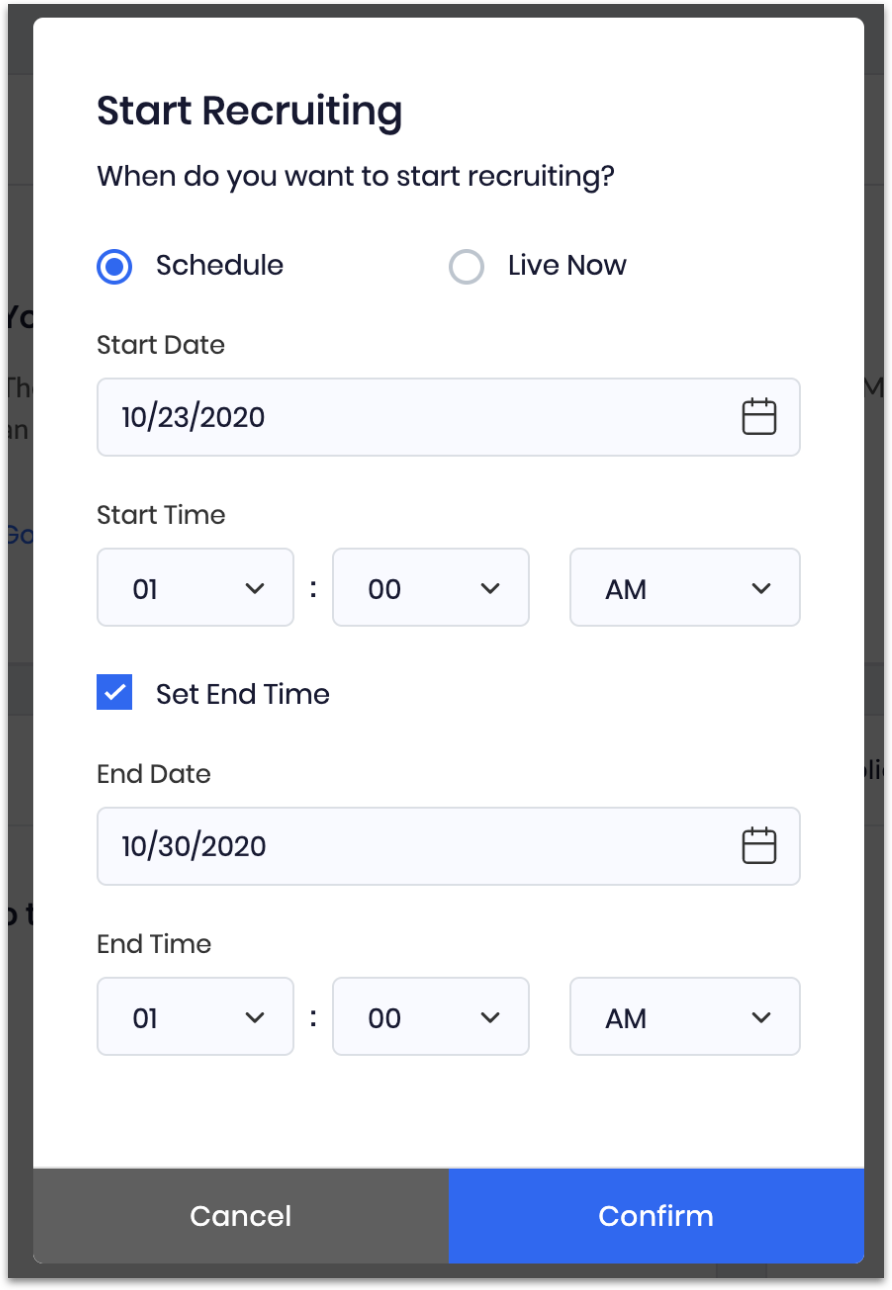
- To schedule:
- Select Schedule.
- Select a Start Date.
- Select a Start Time.
- Click Confirm.

If you want the recruit to stop recruiting automatically at a specified time, check the Set End Time option.
- Select an End Date.
- Select an End Time.
- Click Confirm.
Note: If you have selected "No screening required" when creating the project, your project would not have a recruitment menu on the dashboard. You can invite and manage participants directly from the Participants menu. Learn more about project participants.
Live recruitment
Once your project has started recruiting, applicants will be able to apply and you will see their applications on your methinks dashboard under Recruitment > Applications.
Learn more about Project Applications.
Edit recruitment details
To make changes to your project recruitment settings:
- Click on the Recruitment drop-down menu button.
- Click on Settings.
To edit recruitment settings:
Step 1: Click on Edit.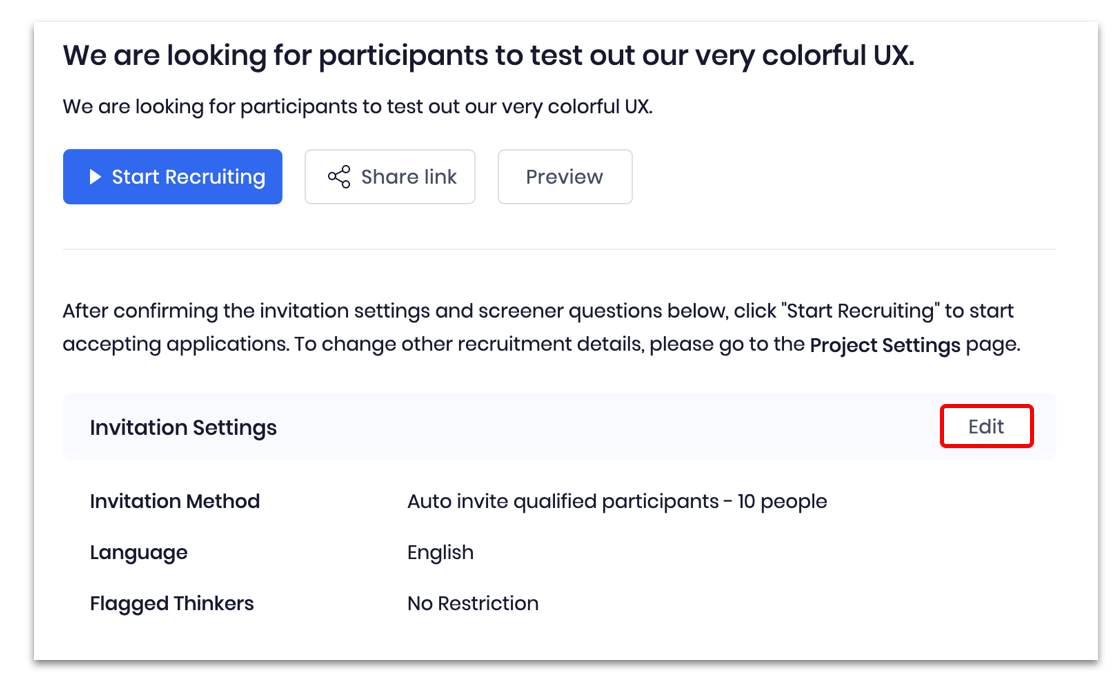
Step 2: Click to edit the following menus:
-
To edit the invitation method:
1. Click on the drop-down menu to select Manual Invitation or Auto Invitation. If Auto Invitation is selected, input the number of participants that should be invited to participate in your project.
Note: You can edit the number of participants to an auto invitation at any time. - To edit the language setting:
1. Click on the drop-down menu to change the language selection.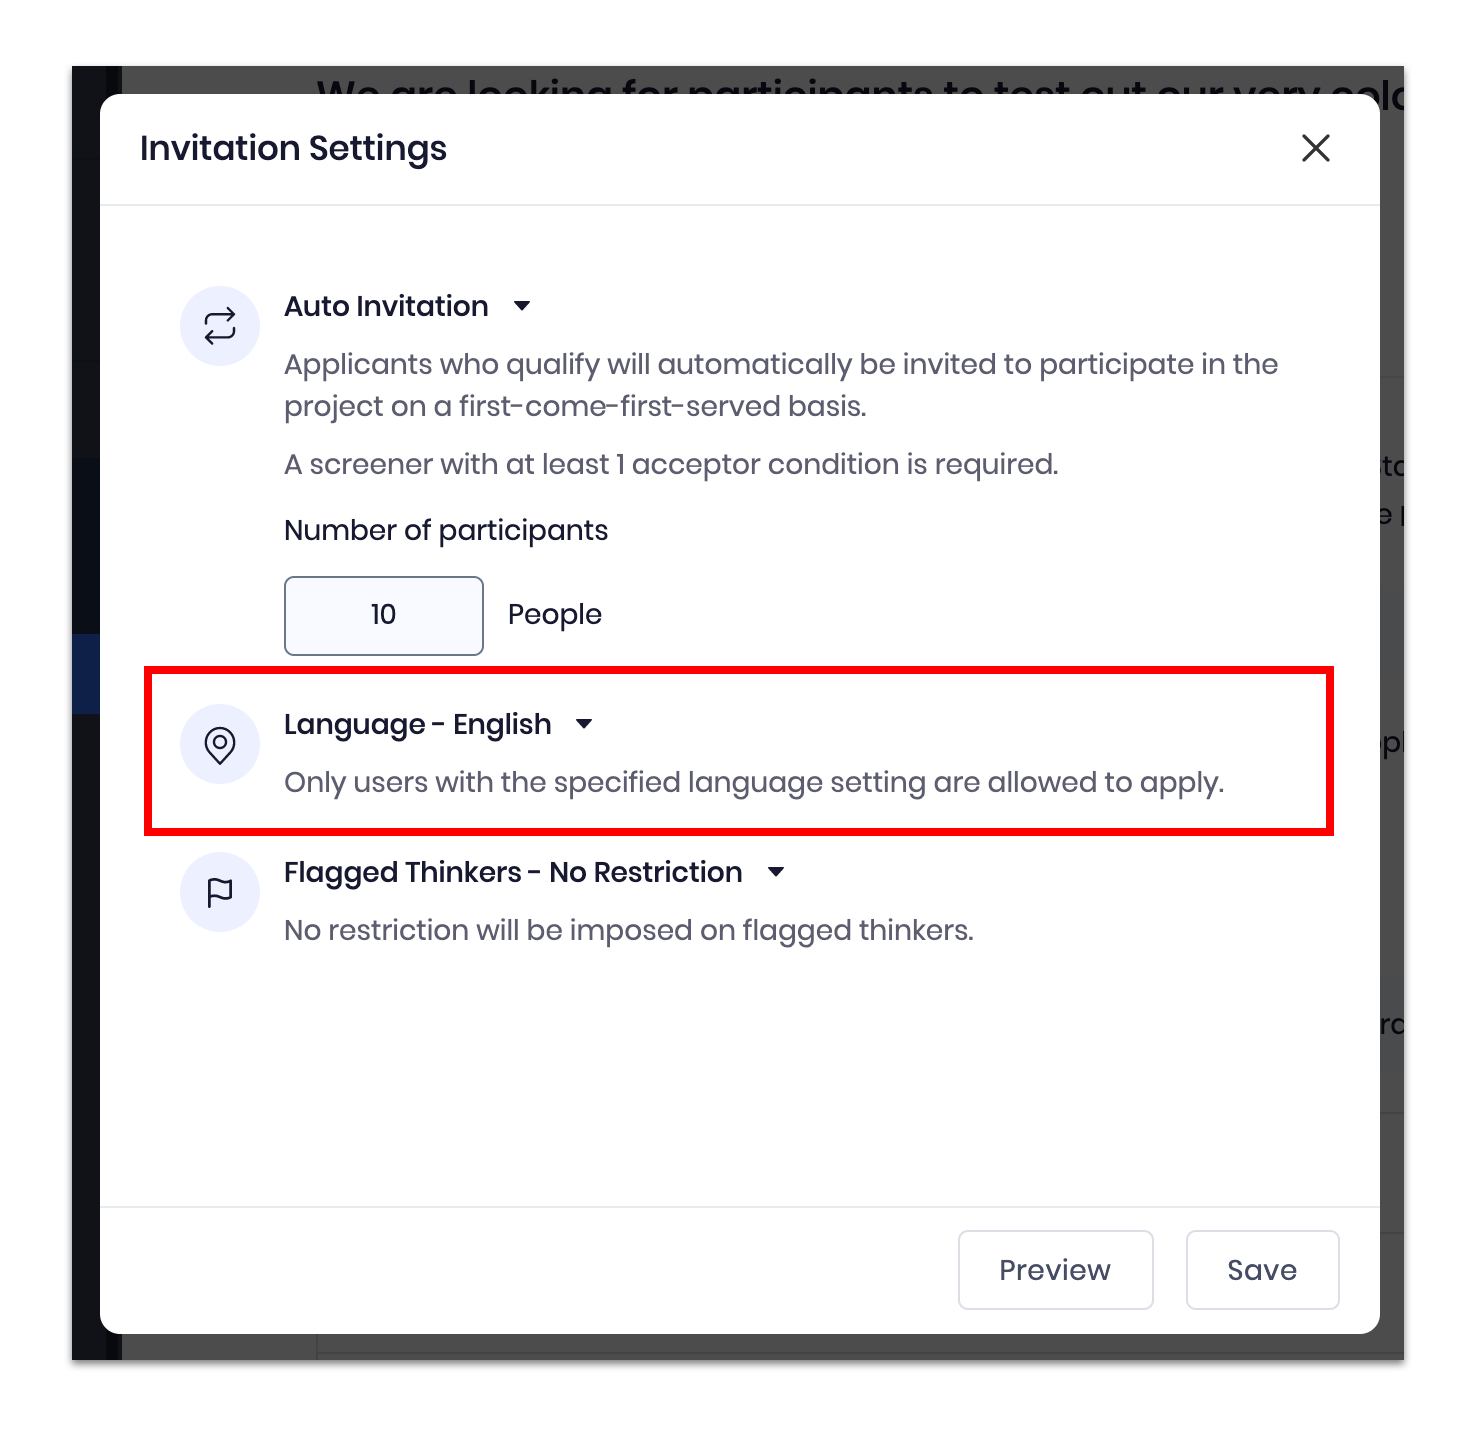
2. Click to select the option that best fits your project needs.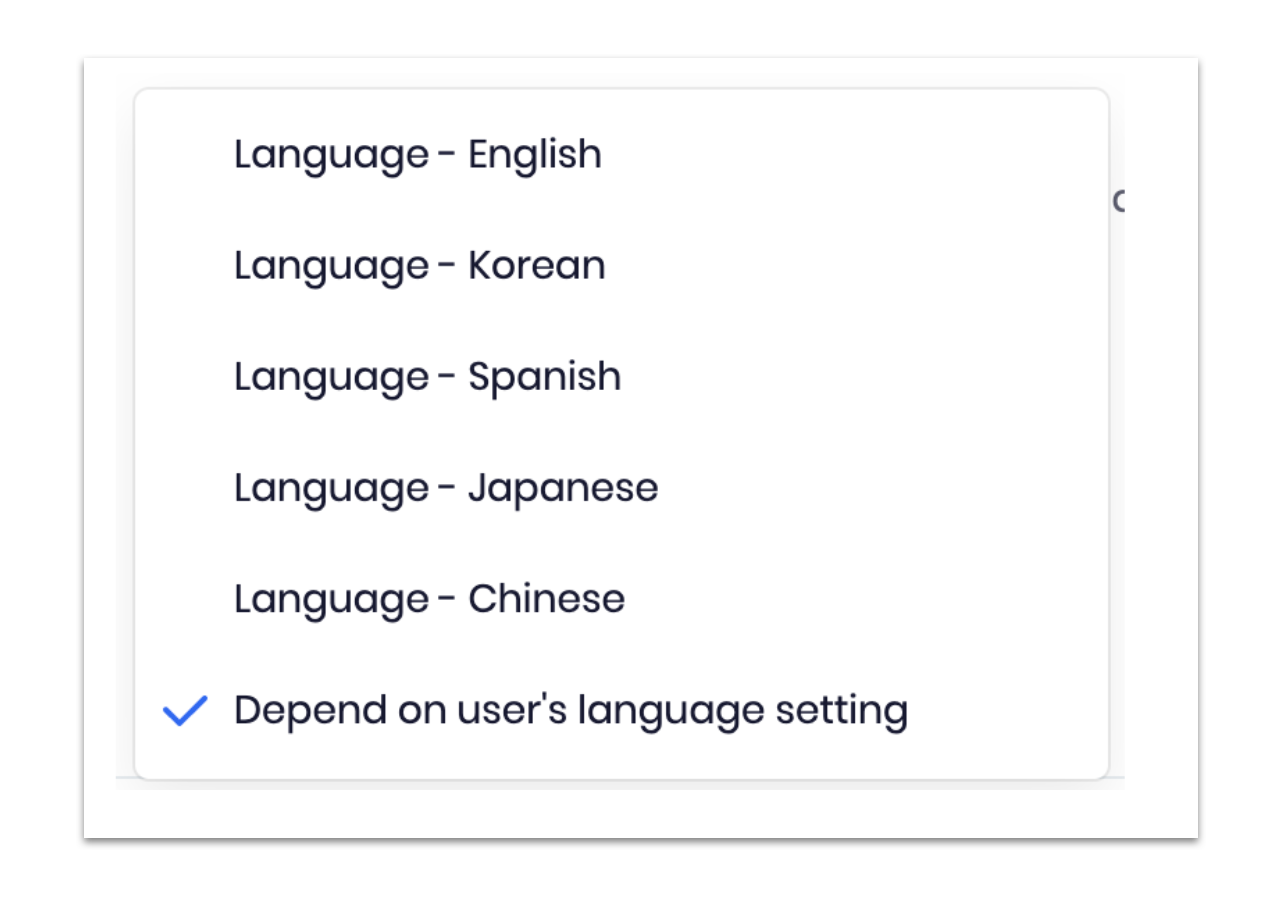
Note: Only users with the specified language setting are allowed to apply. - To edit Flagged Thinkers settings:
*Flagged Thinkers are Thinkers that were flagged by you or other researchers. Flags include: No Show, No response, Unengaged, False Information, Inappropriate, and any custom flags researchers have added.
Learn more about Flagged Thinkers.
1. Click on the Flagged Thinkers drop-down menu to make changes to the flagged Thinkers settings.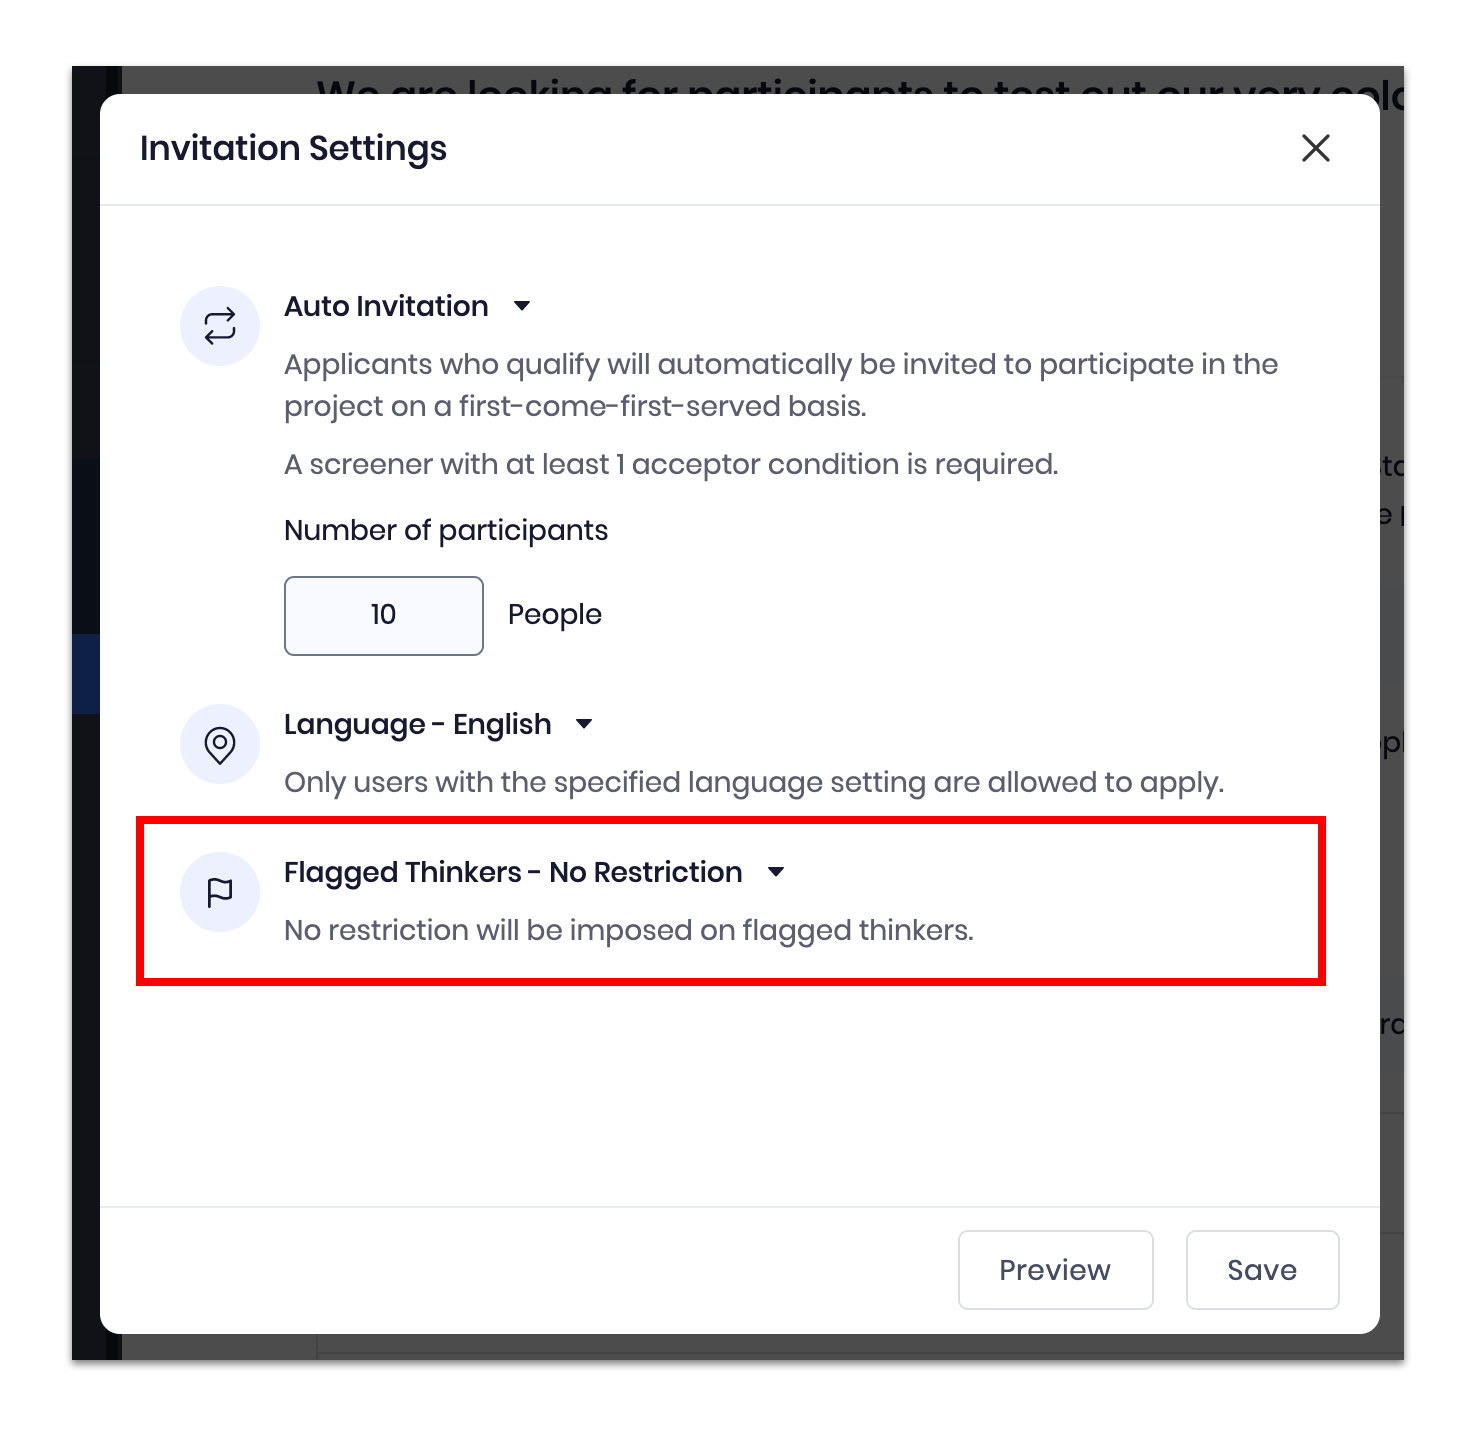
2. Click on the best setting that fits your research project.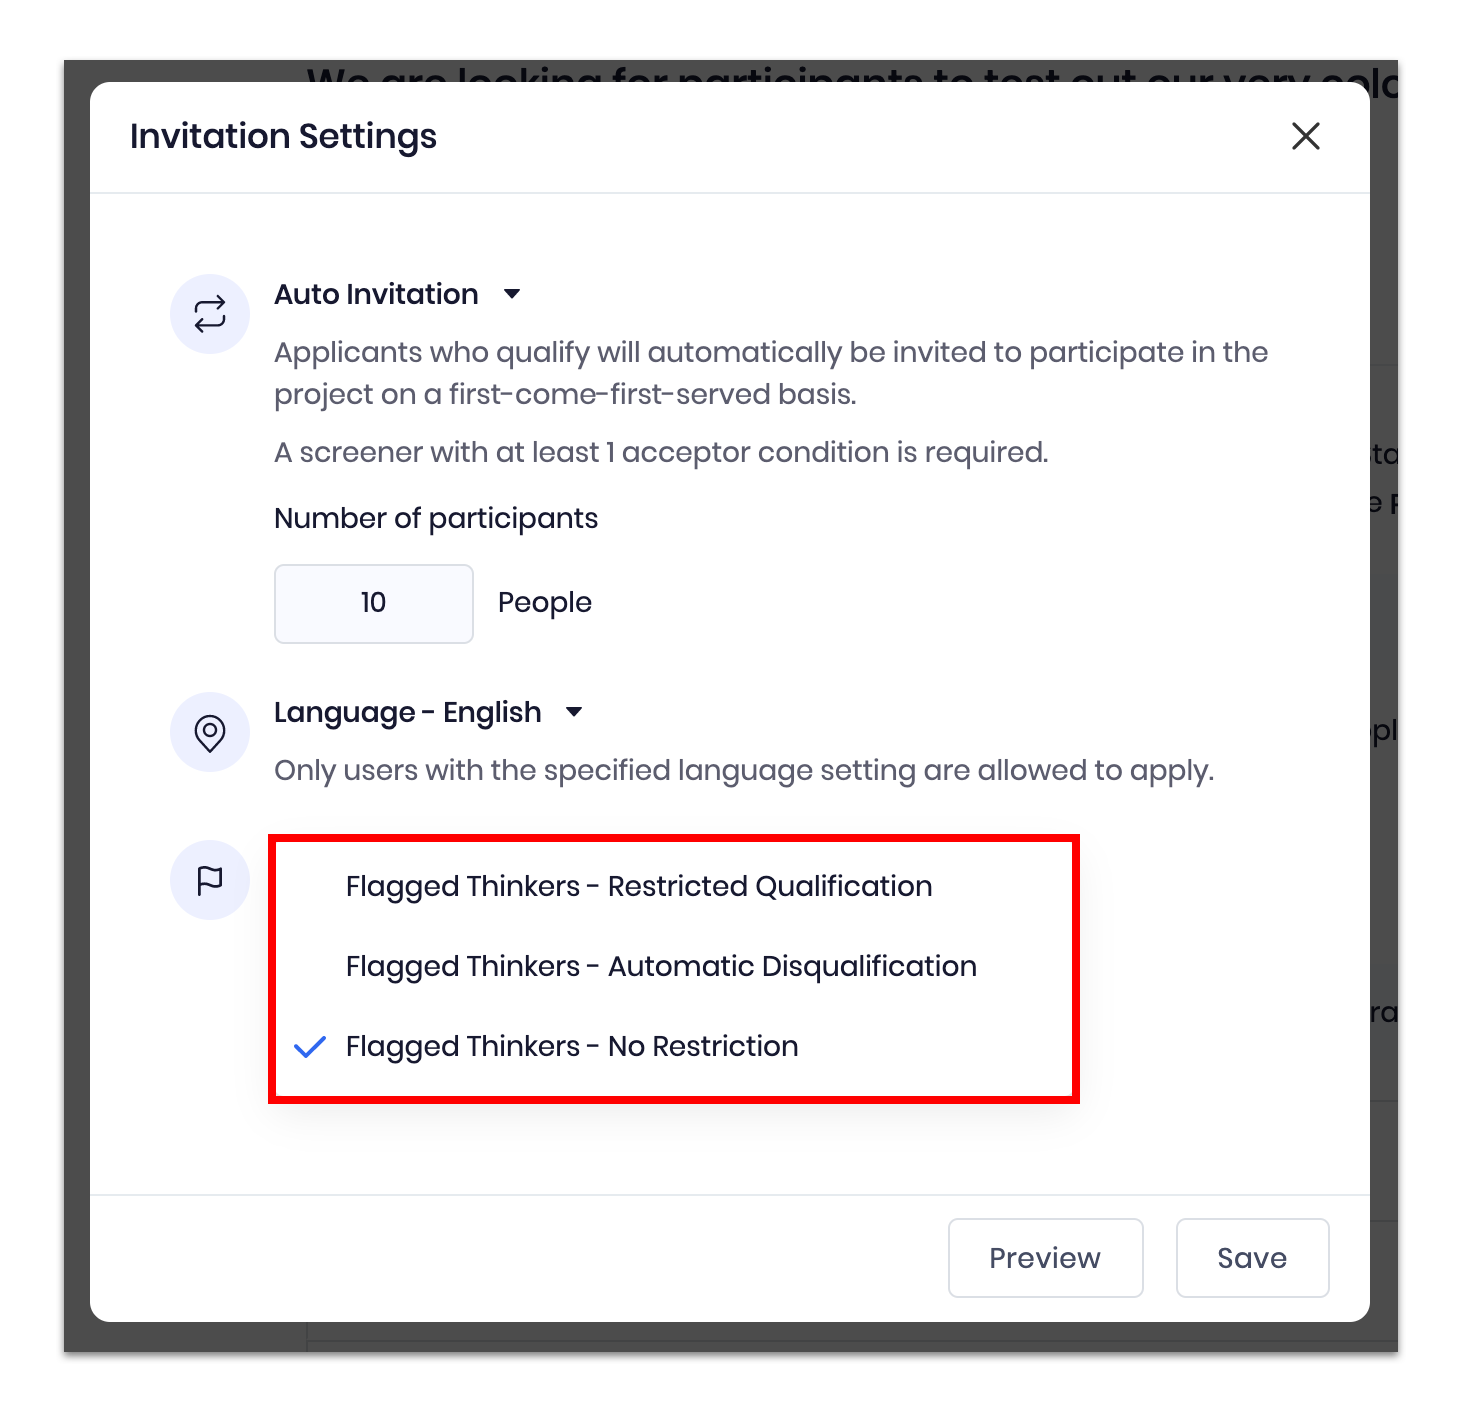 Flagged Thinkers - Restricted Qualification
Do not automatically qualify flagged thinkers.
Flagged Thinkers - Automatic Disqualification
Automatically disqualify flagged thinkers.
Flagged Thinkers - No Restriction
No restriction will be imposed on flagged thinkers.
Note: You can always manually qualify and disqualify users if needed.
Step 3: Click on Save.
Pro tip: Click on Preview to view how the project recruitment details and information will look like to your project participants.
Note: Remember to click on Start Recruiting to start recruiting participants for your research project.
Learn more about manual and automatic recruitments invitations.
To create or edit screener questions
Step 1: Click on the drop-down menu Recruitment > Settings.
If you have already created screener questions for your research project you will find the screener questions below the Screener Questions section.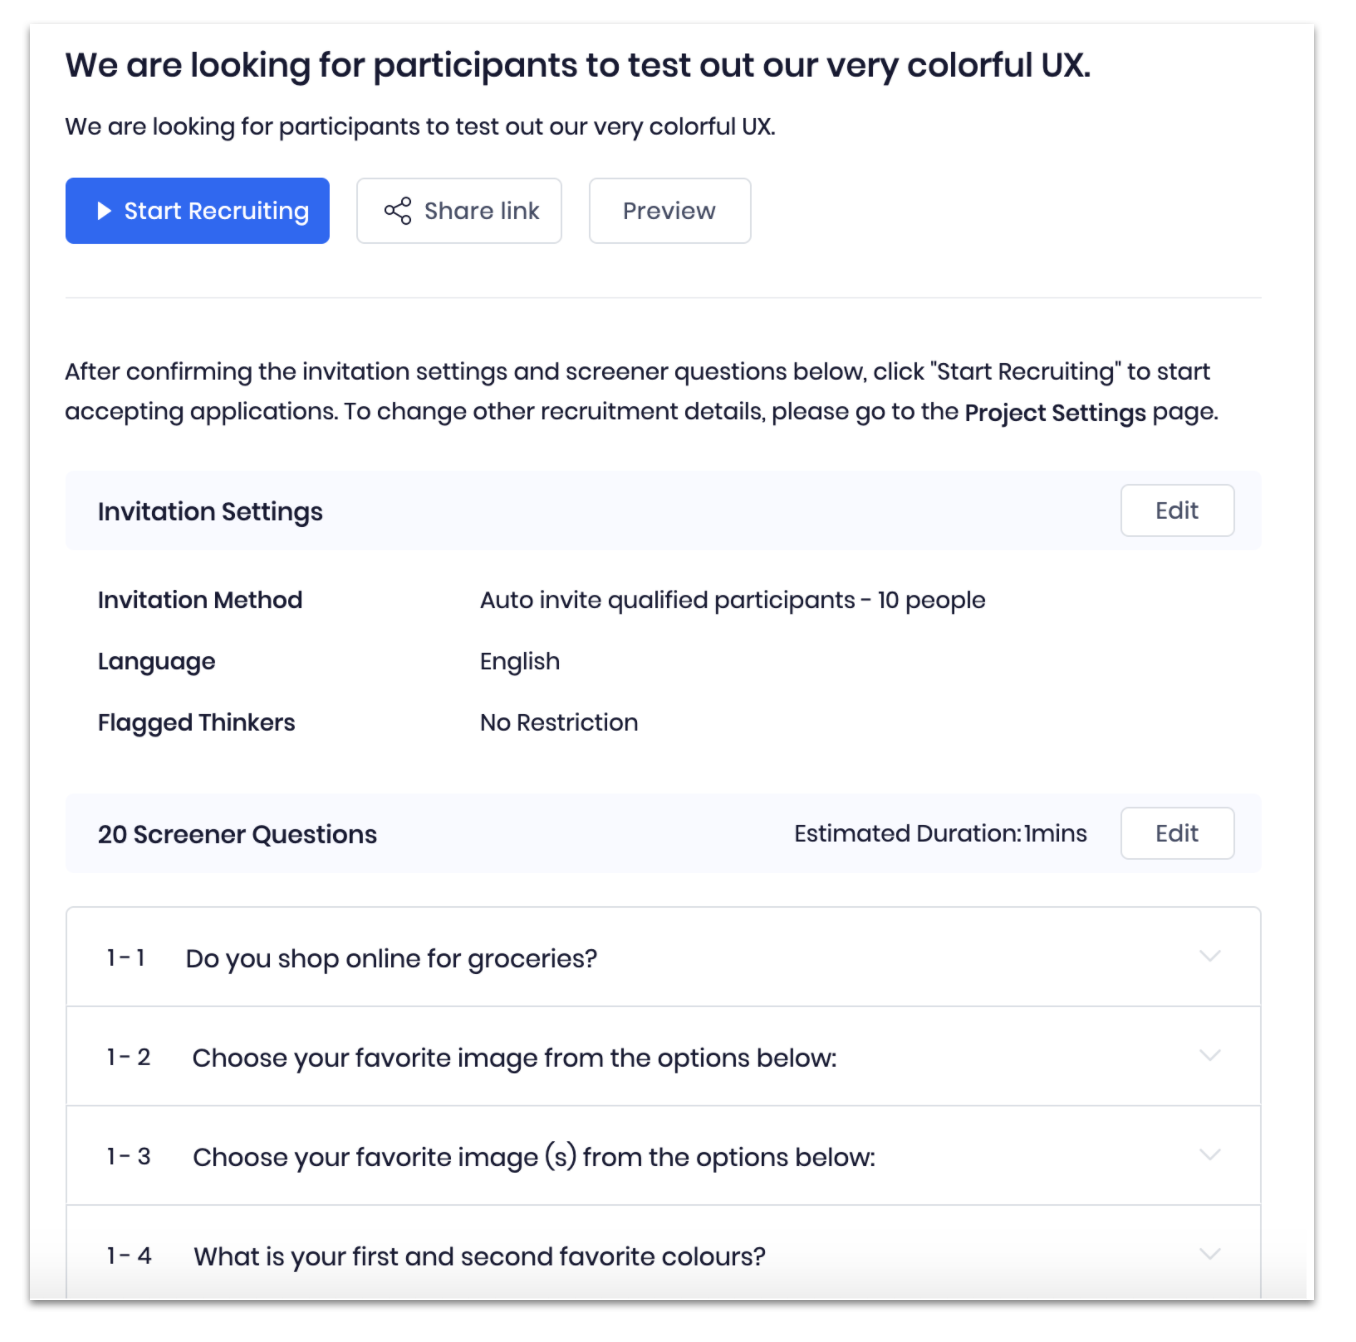
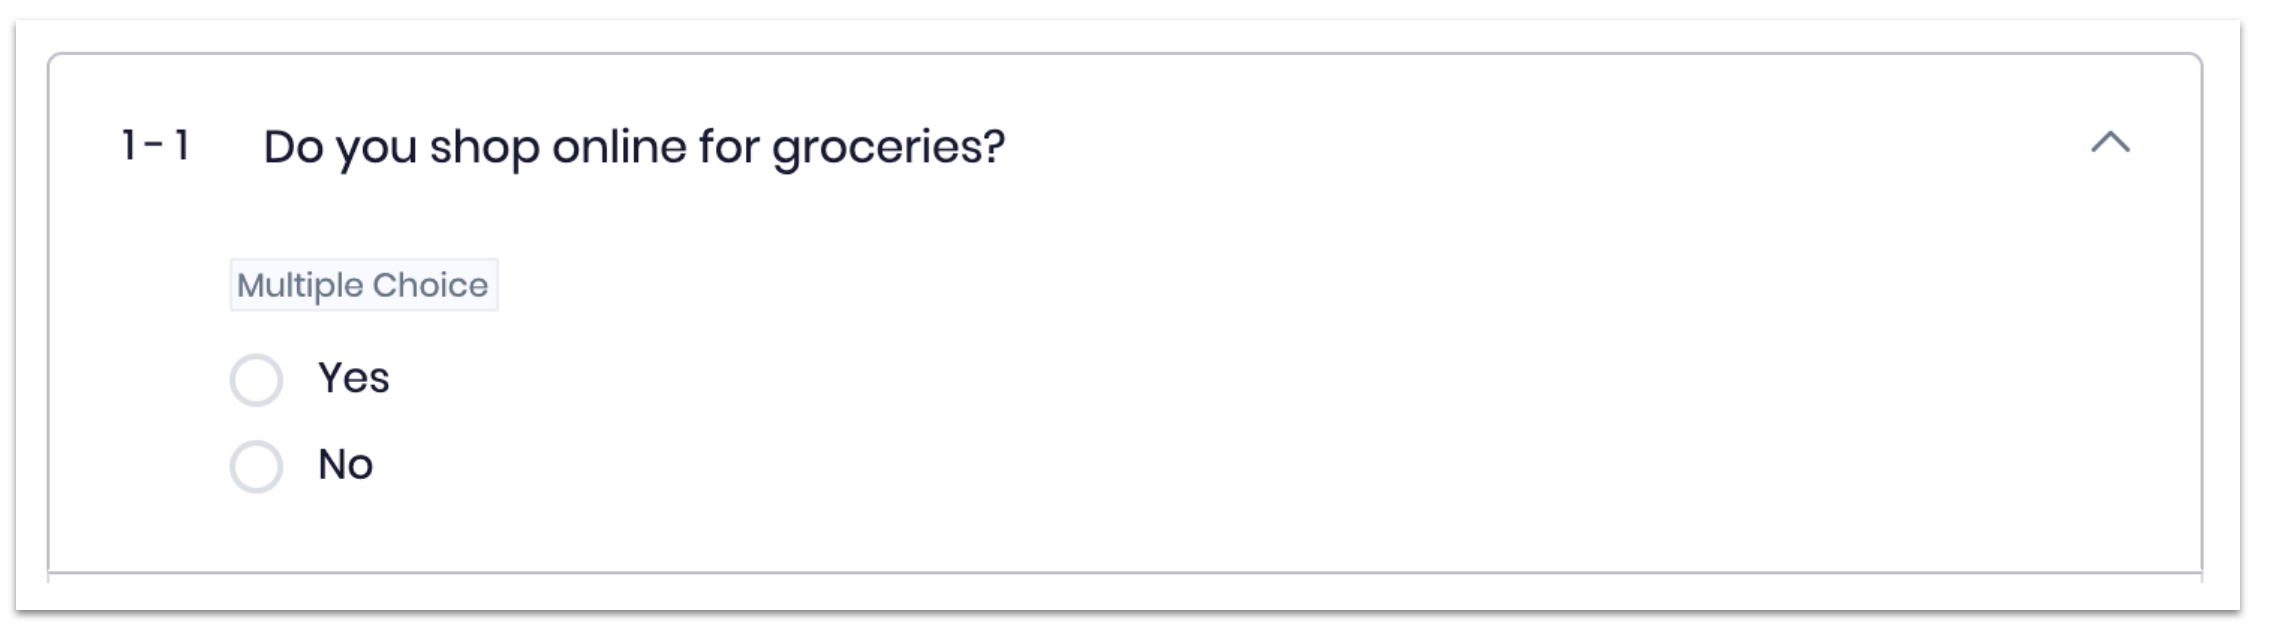
To see details about a screener question hover over the question with your mouse and click the arrow to expand.
If you haven’t already created screener questions in the Screener Question section you will see a button to create them, follow the instructions below to create screeners. 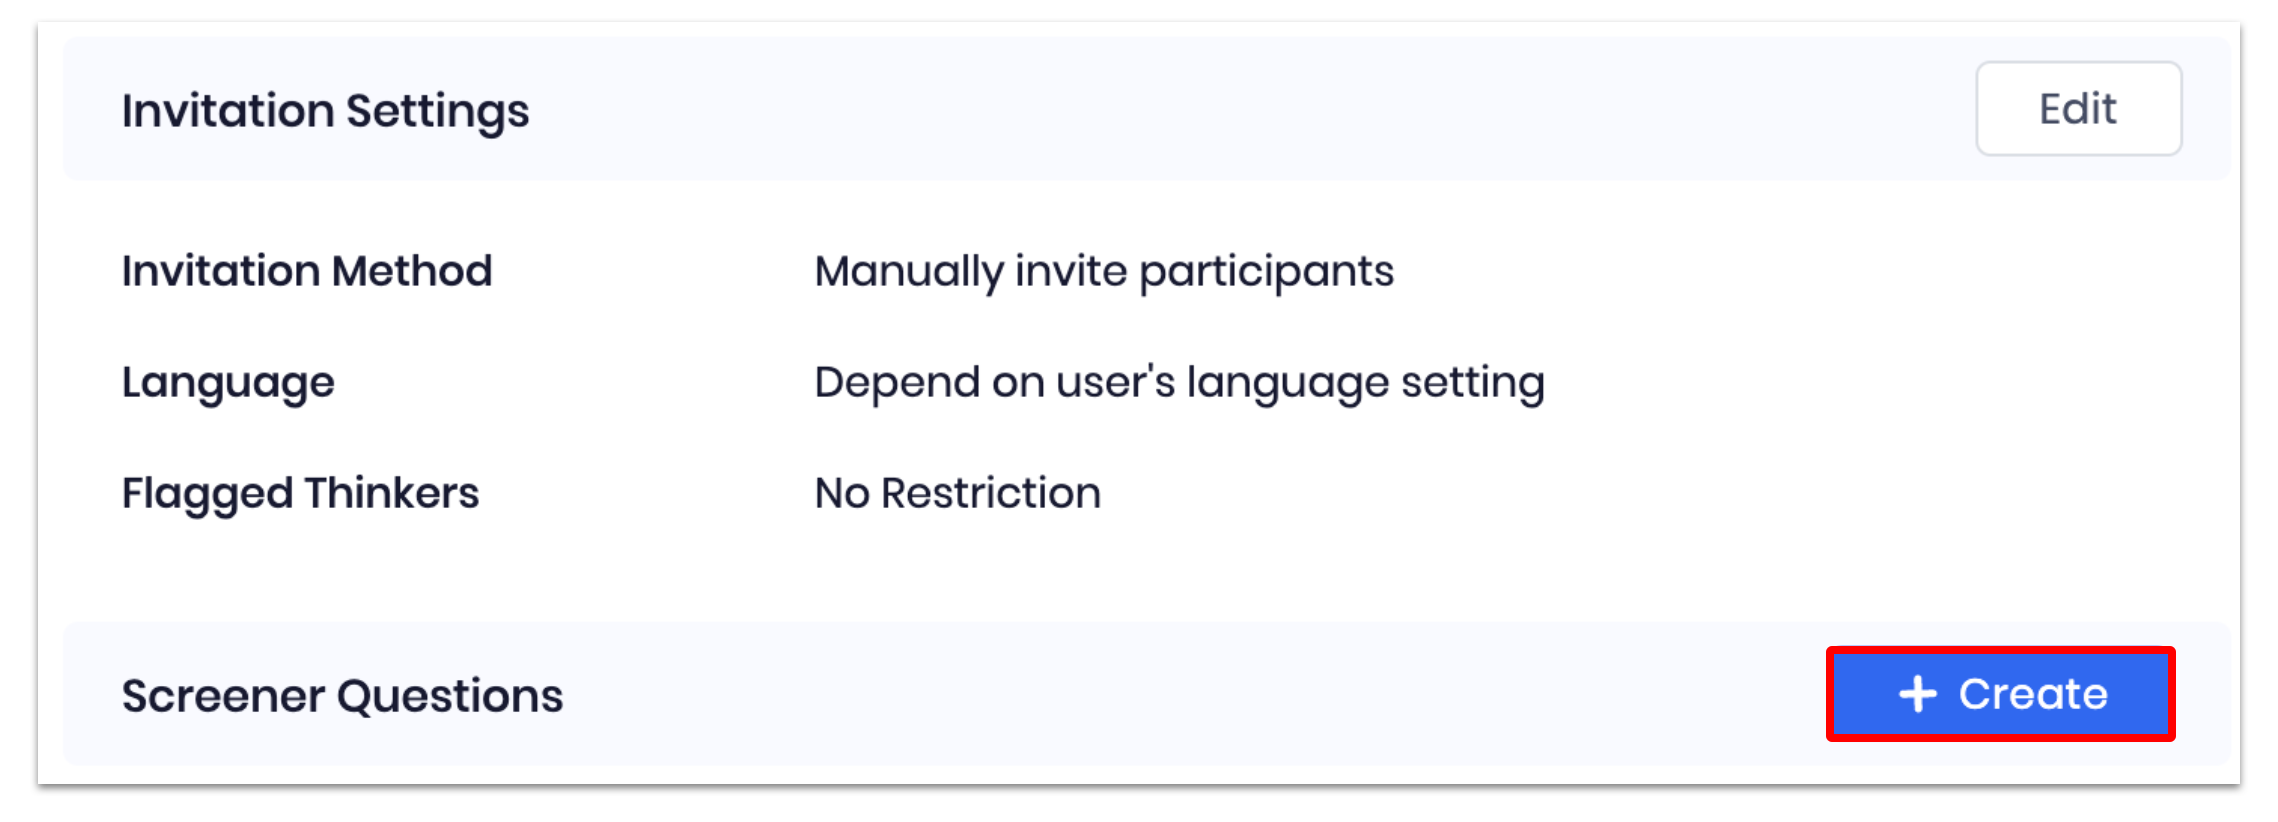
- To create screener questions:
1. Click on + Create.
2. Create screener questions and sections.
3. Click on Save.
- To edit screener questions:
1. Click on Edit.
2. Make the changes you want to your project screener questions pack.
Step 2: Click on Save.
Learn more about how to set up screener questions.
Related articles
Recruiting participants
Screener questions
Comments
0 comments
Please sign in to leave a comment.