Question Editor for Screeners and Surveys
The question editor's core functionalities, such as adding and removing sections and questions, are identical independent of the type of questions pack that you are creating (screener questions, surveys, and app test surveys). However, specific functionalities such as acceptors/rejectors are only available in specific packs, in this case, the Screener Pack.
Refer to the related article to find information about specific functionalities for each pack:
How to create screener questions
How to create a survey
How to set up an app test survey
Topics covered in this article:
- Sections and questions
- Section arrangement
- Create a section sequence
- Add an image to a question or create an image standalone question
- Font feature shortcuts
- Question types
- Wheel type display
Sections and questions
Questions are categorized by sections. By adding sections, the "Section Sequence" feature will be enabled, allowing you to design proper sequence logic for your surveys.
Follow the steps below to edit your screener and survey packs and create sections and questions.
Questions Editor Overview
- To edit your Screener/Survey Pack name click on the pencil icon and type in the text.

-
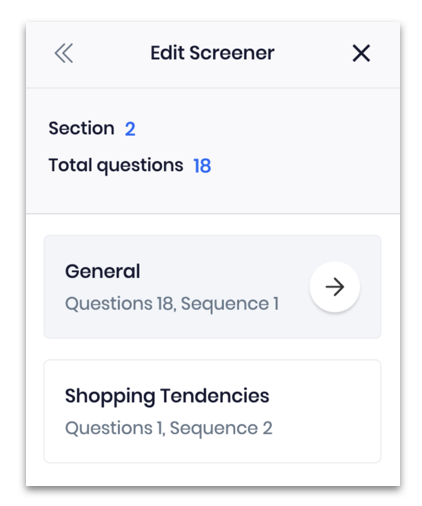
To view your sections and questions outlined on a Screener/Survey Pack check the left side of your survey editor.
-
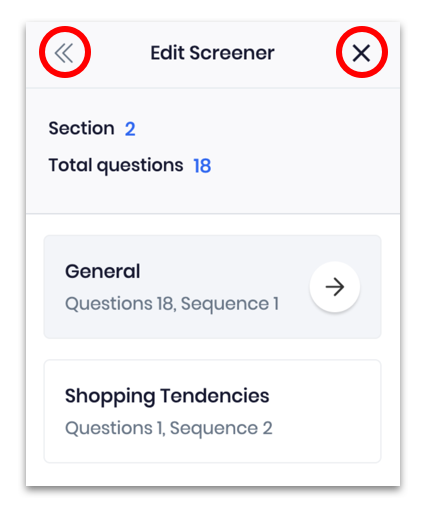
To collapse your sections and questions outlined on a Screener/Survey Pack click on the double arrow or the x icon. You can expand or collapse the outline at any time by clicking on the icons again.
-
Section arrangement
To rearrange your questions sections:- Hover over the section you want to rearrange.
- Click and hold to move it up or down.
- Release the section at the desired position.

-
Hover over a section and click on the arrow icon to be taken directly to the start of the section chosen.

- To preview your screener/survey questions click on the mobile icon.

- To Download Preview as PDF or Delete the Screener/Survey Pack click on the three-dotted menu icon.

-
Save your questions by clicking on the Save button.

-
To exit the Screener/Survey Pack Editor click on the x button.

Sections
- To edit a section title and description:
1. Click on the section field, labeled as Untitled Section.
2. Add the title on top and description in the box below (optional).
Note: Hover with your cursor over the icons in the editor to read their function and shortcut. - To duplicate or delete a section:
1. Click on the three-dotted menu button and select the desired option.
- To choose an "after section" action:
Specify what questions the applicants should answer after they have finished with a section by selecting the "after section" option below each section.
Click on the drop-down menu button to choose the action for each section. The options are:
- Continue to the next section
- Move to: Section “x” (this will change in quantity depending on the number of sections you add to a screener/survey pack)
- Finish screener/survey

- Floating toolbar functions
On the right side of every selected screener/survey question or section, you will find a floating toolbar.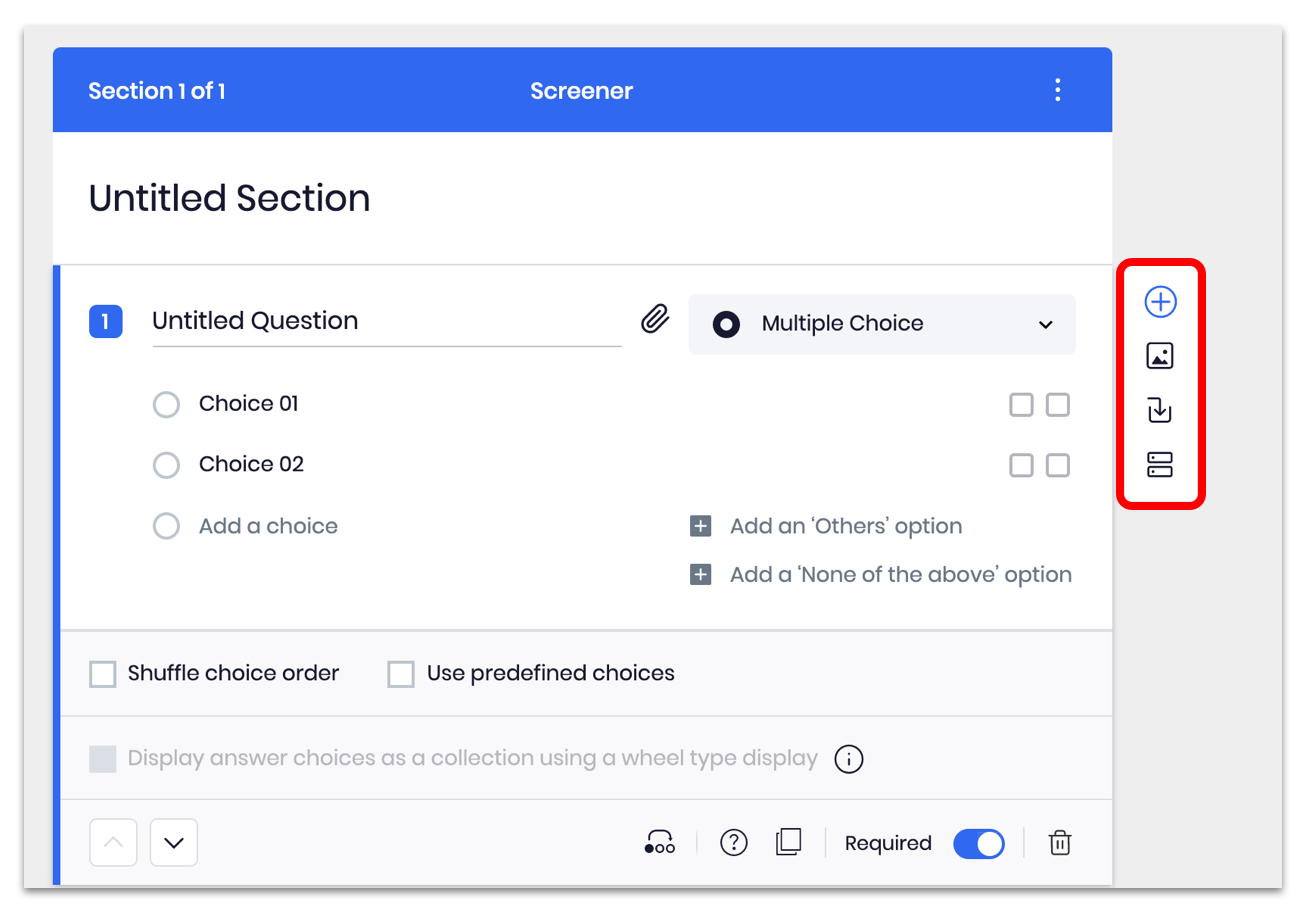
-
-
To add a new question click on icon #1.
-
To add an image as a standalone question click on icon #2.
-
To import questions click on icon #3.
-
To create a new section click on icon #4.

-
-
-
To edit a question:
1. Click on the Question field to edit the text and see the full question editor.
-
To change font features within section and questions titles:
1. Highlight the text that you want to make font changes to.
2. a. On your keyboard, hold on to Command (Mac)/Ctrl (Windows) + B to bold.
b. Or, hold on to Command (Mac)/Ctrl (Windows) + I to change the font to italics.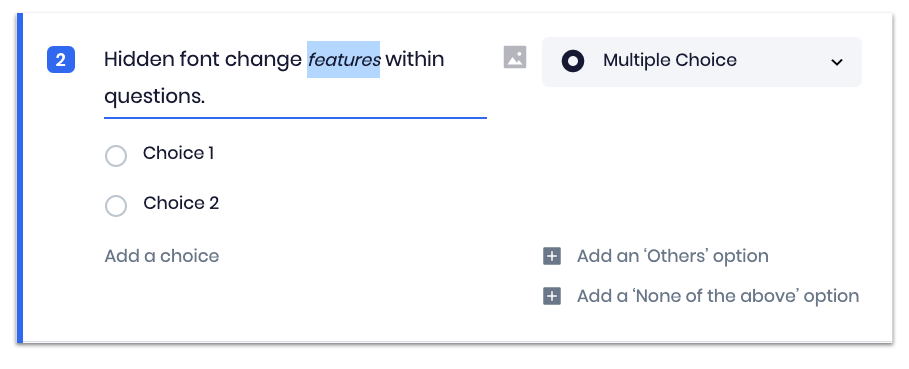
Question types
Within the methinks dashboard, you have the option to choose from 16 different types of screener/survey questions, plus an image standalone question type. For app test surveys, you have the option to choose from 6 question types, plus an image standalone question type. Refer to the related topics to find information about the specifications of Screener Questions, Surveys, and App Test Surveys.
Common features for all question types
Although each question has its type of tooling, which is discussed below, all questions have the same footer tools.
- Click on the arrow up or down to change the position of your question.

- Click on the question mark to have quick access to a question guide.

- Click on the copy document icon to duplicate the question.

- Click on the Required toggle to switch it on or off.
 Note: The Required toggle is "on" by default. Setting it to the "off" position makes the question optional. Applicants can move on to the next question without answering this non required question answer.
- Click on the Trash Can icon to delete a question.

Another tool that you will always be able to use for all question types is the add image in the question function.
-
To add on an image to a question:
1. Click on the Image (Insert image to question) icon.
2. Select the image you want to upload.
3. Click on Upload.

To delete the image simply click on the X button.
Pro tip: The difference between adding an image to a question and a standalone image question is that by clicking on the Image (insert image to question) icon you can add an image to any type of question and insert text question and answer options. Whereas by clicking on Add image as a standalone you can only add text information/instructions/title to the image standalone question. Example of an image as a standalone question: 
- To change answers positions:
1. Hover over the answer you want to change position.
2. Once you see your mouse interface symbol change from selector to four club-spoked asterisks (✥), click and hold to move the answers position up or down.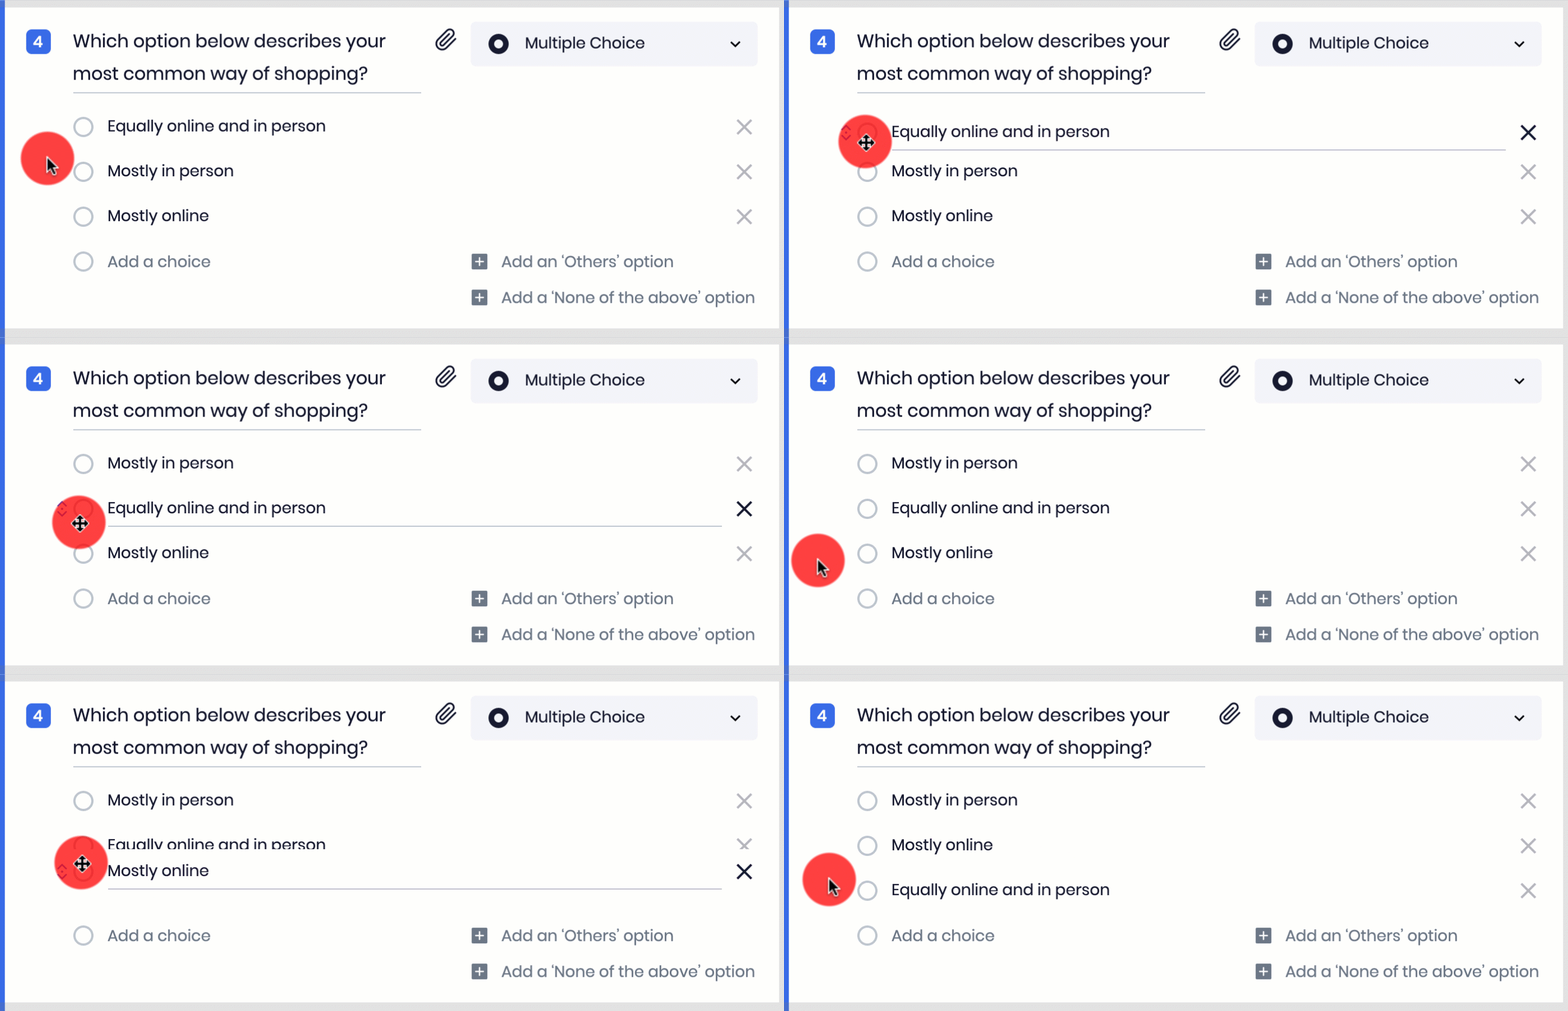
Find below a detailed explanation about how each question works and how to set them up.
Multiple Choice
This question type asks respondents to select a single choice from the options provided.
To create a multiple-choice question:
1. Select Multiple Choice.
2. Add the question text to the question field.
3. Add the choices for this question.
- To quickly add another choice to the multiple-choice question, click on Add Choice, Add an "Others" option, or Add a "None of the above" option.
- Add an "Others" option: allows respondents to type out an additional response not provided in the list of answers.
- Add a "None of the above" option: allows respondents to choose "none of the above" if their answers are not provided in the given answers choices.
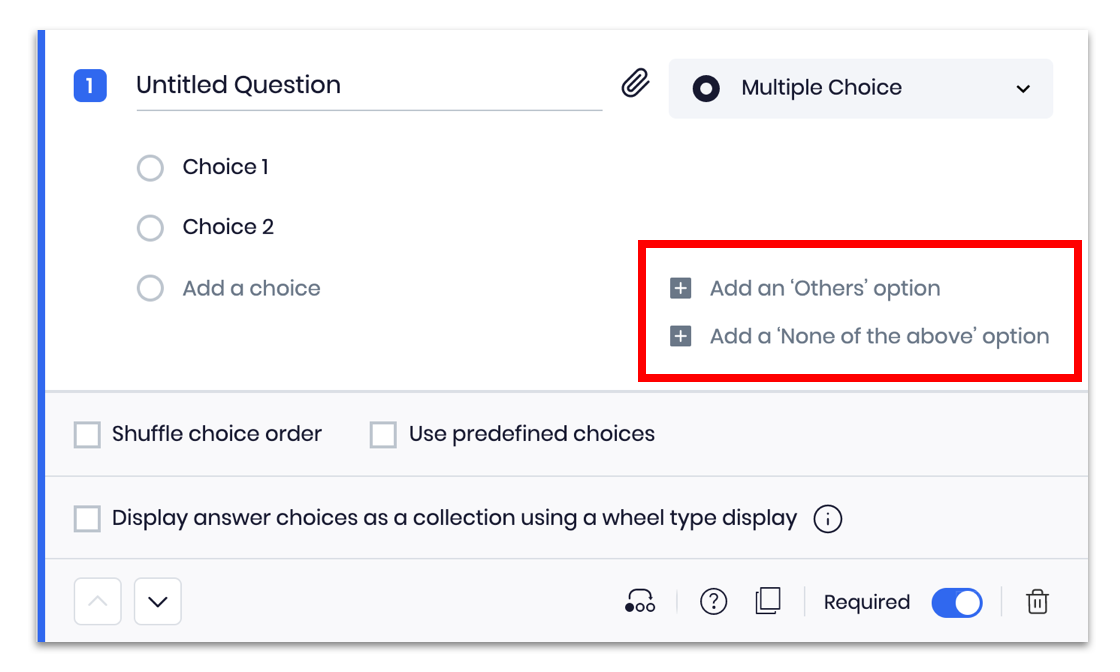
See below:

- Add an "Others" option: allows respondents to type out an additional response not provided in the list of answers.
- Screener Pack only: To add Acceptor and Rejector options to your screener, select the green checkmark option on the left (acceptor) or select the red checkmark option on the right (rejector). You can also choose to leave the selection empty.
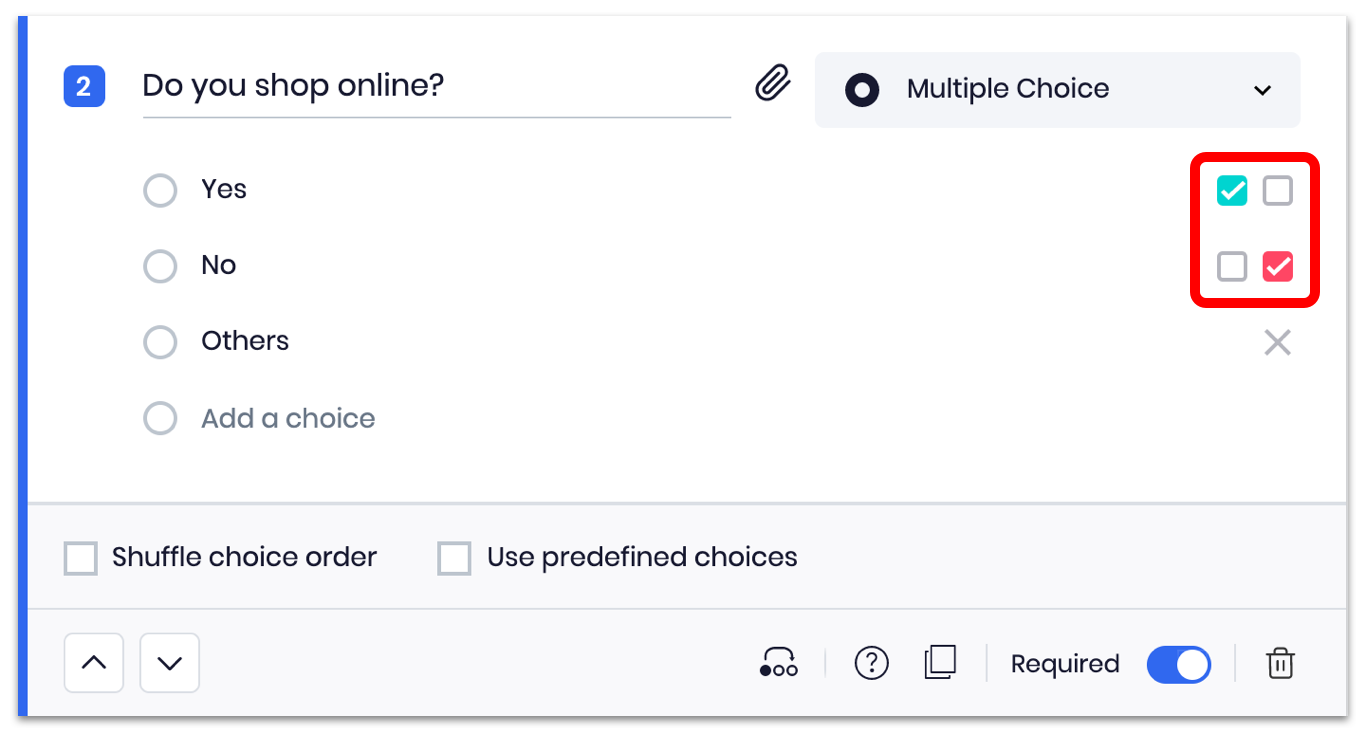
Note: Applicants are shown on the Recruitment > Applications page in your dashboard.
All of the applications can be found under “All”, independent of their answers. Applicants who have picked all "acceptor" answers (and no "rejector" answer) can be found under the Qualified tab, and applicants who have selected any "rejector" answers can be found under the Disqualified tab. You can also manually move participants to different tabs. Learn more about default and custom tabs and screener answers.
The tabs are there to help you organize your participants. An applicant being put under the Qualified tab doesn't mean that the person has been invited to the project. Learn more about inviting an applicant to participate in your project.
-
To create a section sequence based on an applicant's answer:
1. Click on the Set Section Sequence icon.
2. Click the dropdown menu button related to each answer and select Continue/Finish Screener or Survey/Move to Section "x".
Note: Section sequence allows you to direct users to different sections of your screeners/survey depending on their answers to this question. - To shuffle the order of choices, check the Shuffle choice order box. When this option is selected, applicants will see the choices shuffled on their end when answering the question.
-
To display answer choices as a collection using a wheel type display:
1. Simply select the checkbox. Wheel type display example below:
- Predefined choices:
1. Select the checkmark on Use predefined choices.
2. Click the dropdown menu button to choose from predefined countries, states, days, months, and occupation answers.
3. Click on View Details to view all predefined choices under each option.
- Pro tip: (Screener Pack only)
1. Click to add acceptors/rejectors options to the answers.
2. Select Accept All or Reject All and deselect individual answers based on your criteria to speed up the process.
Note: if you choose to not add acceptors and rejectors to your screeners you can still manually sort participants based on their answers and profile at a later time. Learn more about it on Project applications, Default and custom tabs, and Screener answers and profile info of each applicant.
- Pro tip: (Screener Pack only)
4. Click on Save.
Checkboxes
This question type allows respondents to select more than one choice from the options provided.
To create a checkbox question:
1. Select Checkboxes.
2. Add the question text to the question field.
3. Add the choices for this question.
- Screener Pack only: to add Acceptor and Rejector options to your checkboxes question, select the green checkmark option on the left (acceptor) or select the red checkmark option on the right (rejector). You can also choose to leave the selection empty.

Note: Applicants are shown on the Recruitment > Applications page in your dashboard.
All of the applications can be found under “All”, independent of their answers. Applicants who have picked all "acceptor" answers (and no "rejector" answer) can be found under the Qualified tab, and applicants who have selected any "rejector" answers can be found under the Disqualified tab. You can also manually move participants to different tabs. Learn more about default and custom tabs and screener answers.
The tabs are there to help you organize your participants. An applicant being put under the Qualified tab doesn't mean that the person has been invited to the project. Learn more about inviting an applicant to participate in your project.
-
For Checkboxes questions only, you can program it to accept an applicant only if the applicant has selected all the acceptors and/or reject an applicant only if the applicant has selected all the rejectors by checking the corresponding option as shown below.

- Add another option to the checkbox answers:
Add an "Others" option: allows respondents to type out an additional response not provided in the list of answers.
1. Click on Add an "Others" option. -
To shuffle the order of choices, check the Shuffle choice order box. When this option is selected, applicants will see the choices shuffled on their end when answering the question.

- Check the Set range for required choices box and set the minimum and a maximum number of choices that applicants should choose.

For example, 2 - 3 means that an applicant would have to choose at least 2 and at most 3 choices.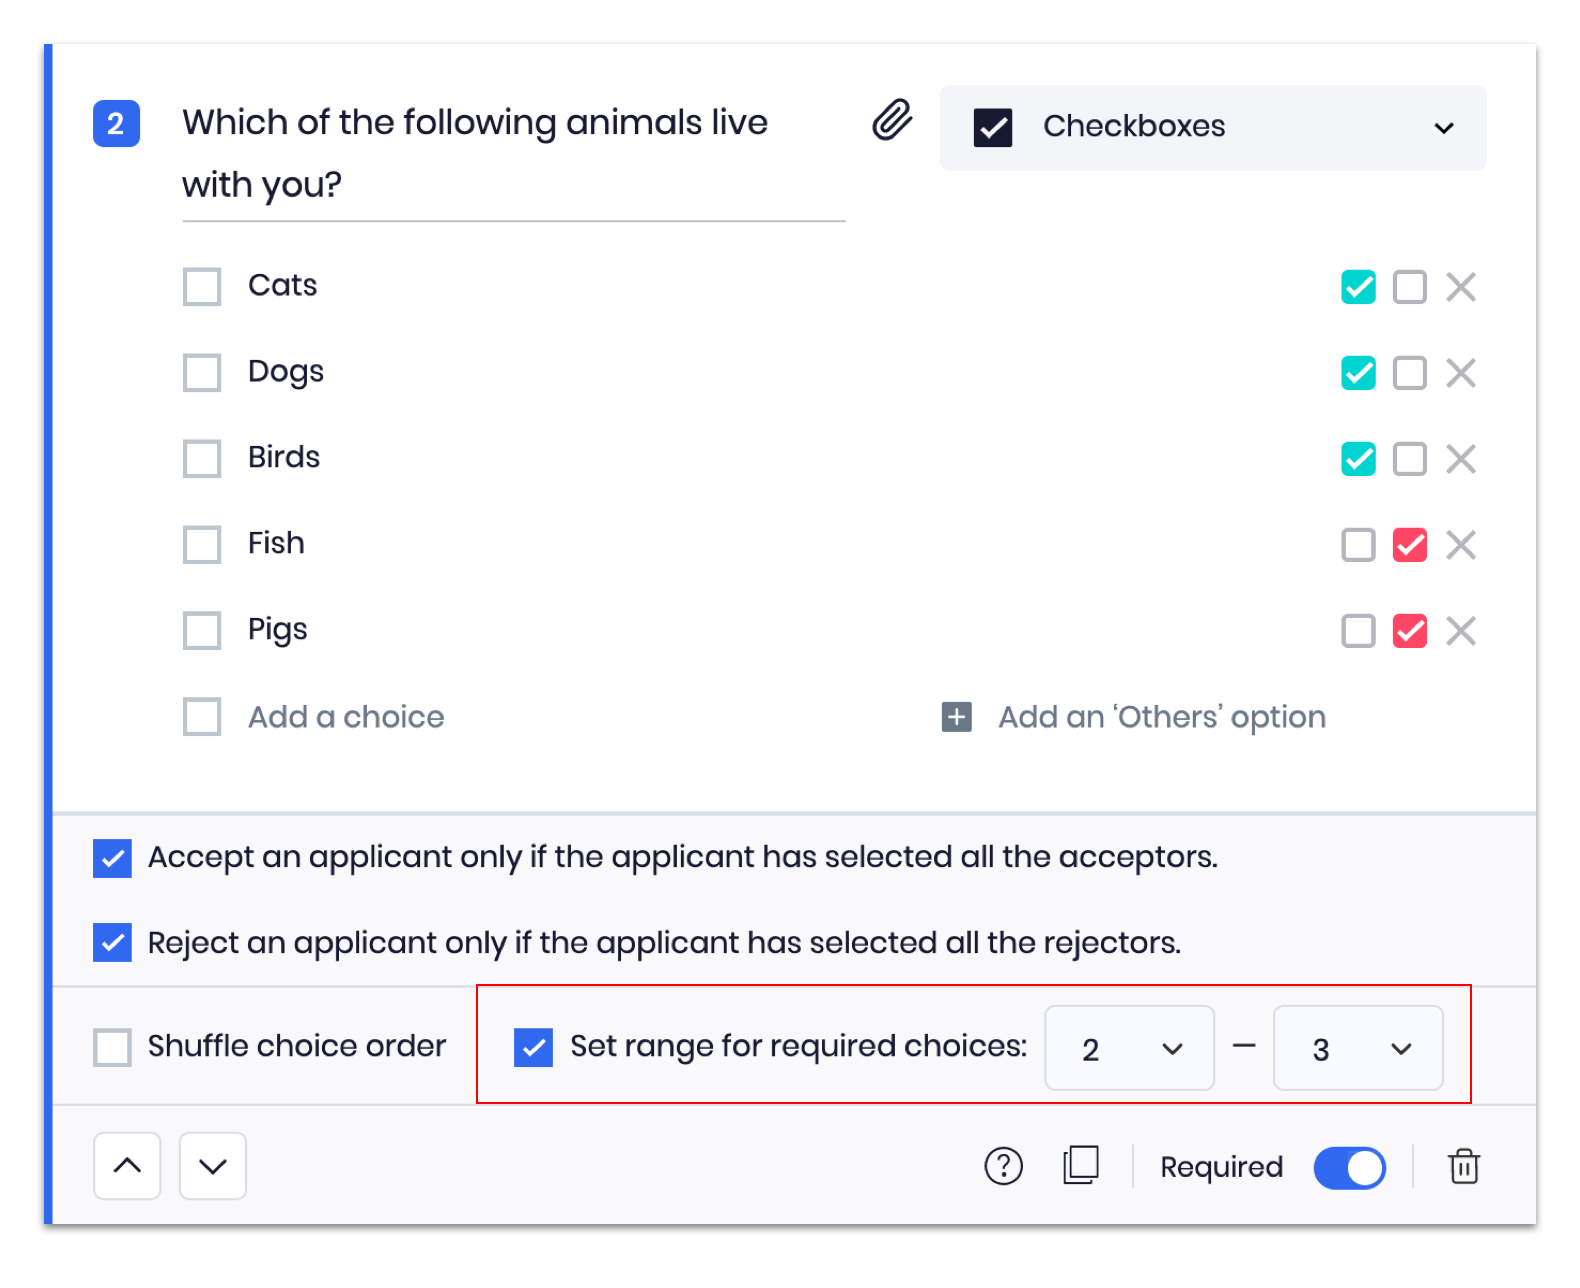
Image - Multiple Choice
This question type asks respondents to select a single image from a list of images provided.
To create an Image - Multiple choice question:
1. Select Image - Multiple Choice.
2. Add the question text to the question field.
3. Drag one or more files into the dotted area or click on Browse to upload and choose the images you want to add. 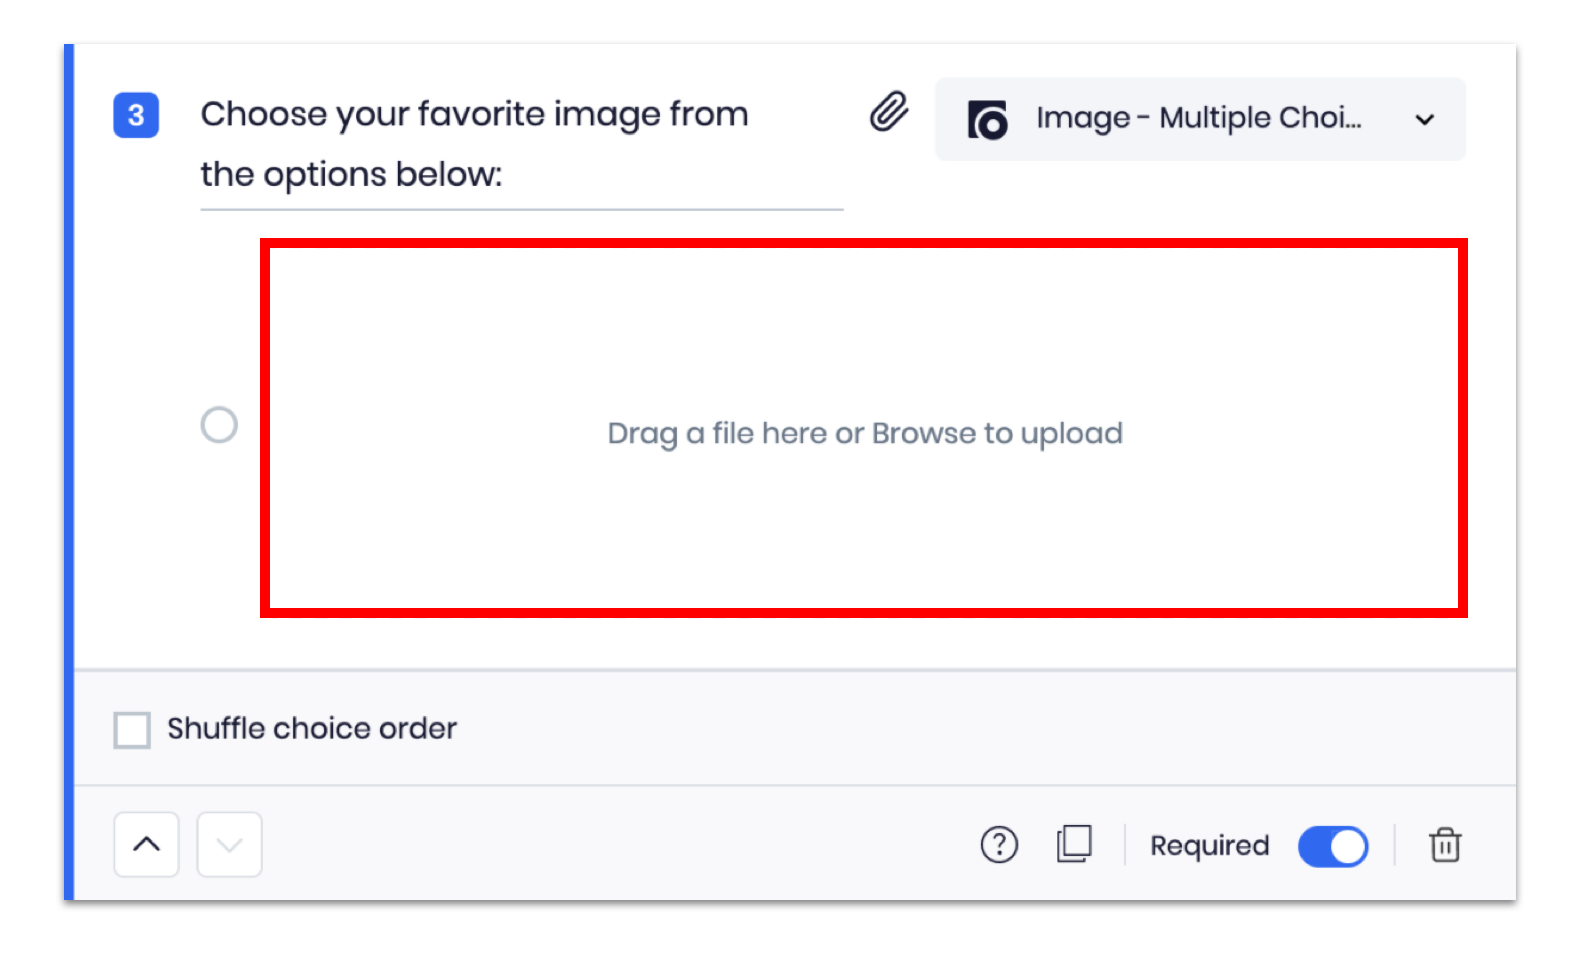 Pro tip: to select multiple images at once, hold down the Shift key on your keyboard, and select all images you want to import as answers choices.
- Screener Pack only: to add Acceptor and Rejector options to your screener, select the green checkmark option on the left (acceptor) or select the red checkmark option on the right (rejector). You can also choose to leave the selection empty.

Note: Applicants are shown on the Recruitment > Applications page in your dashboard.
All of the applications can be found under “All”, independent of their answers. Applicants who have picked all "acceptor" answers (and no "rejector" answer) can be found under the Qualified tab, and applicants who have selected any "rejector" answers can be found under the Disqualified tab. You can also manually move participants to different tabs. Learn more about default and custom tabs and screener answers.
The tabs are there to help you organize your participants. An applicant being put under the Qualified tab doesn't mean that the person has been invited to the project. Learn more about inviting an applicant to participate in your project. - To shuffle the order of choices, check the Shuffle choice order box. When this option is selected, applicants will see the choices shuffled on their end when answering the question.

Image - Checkboxes
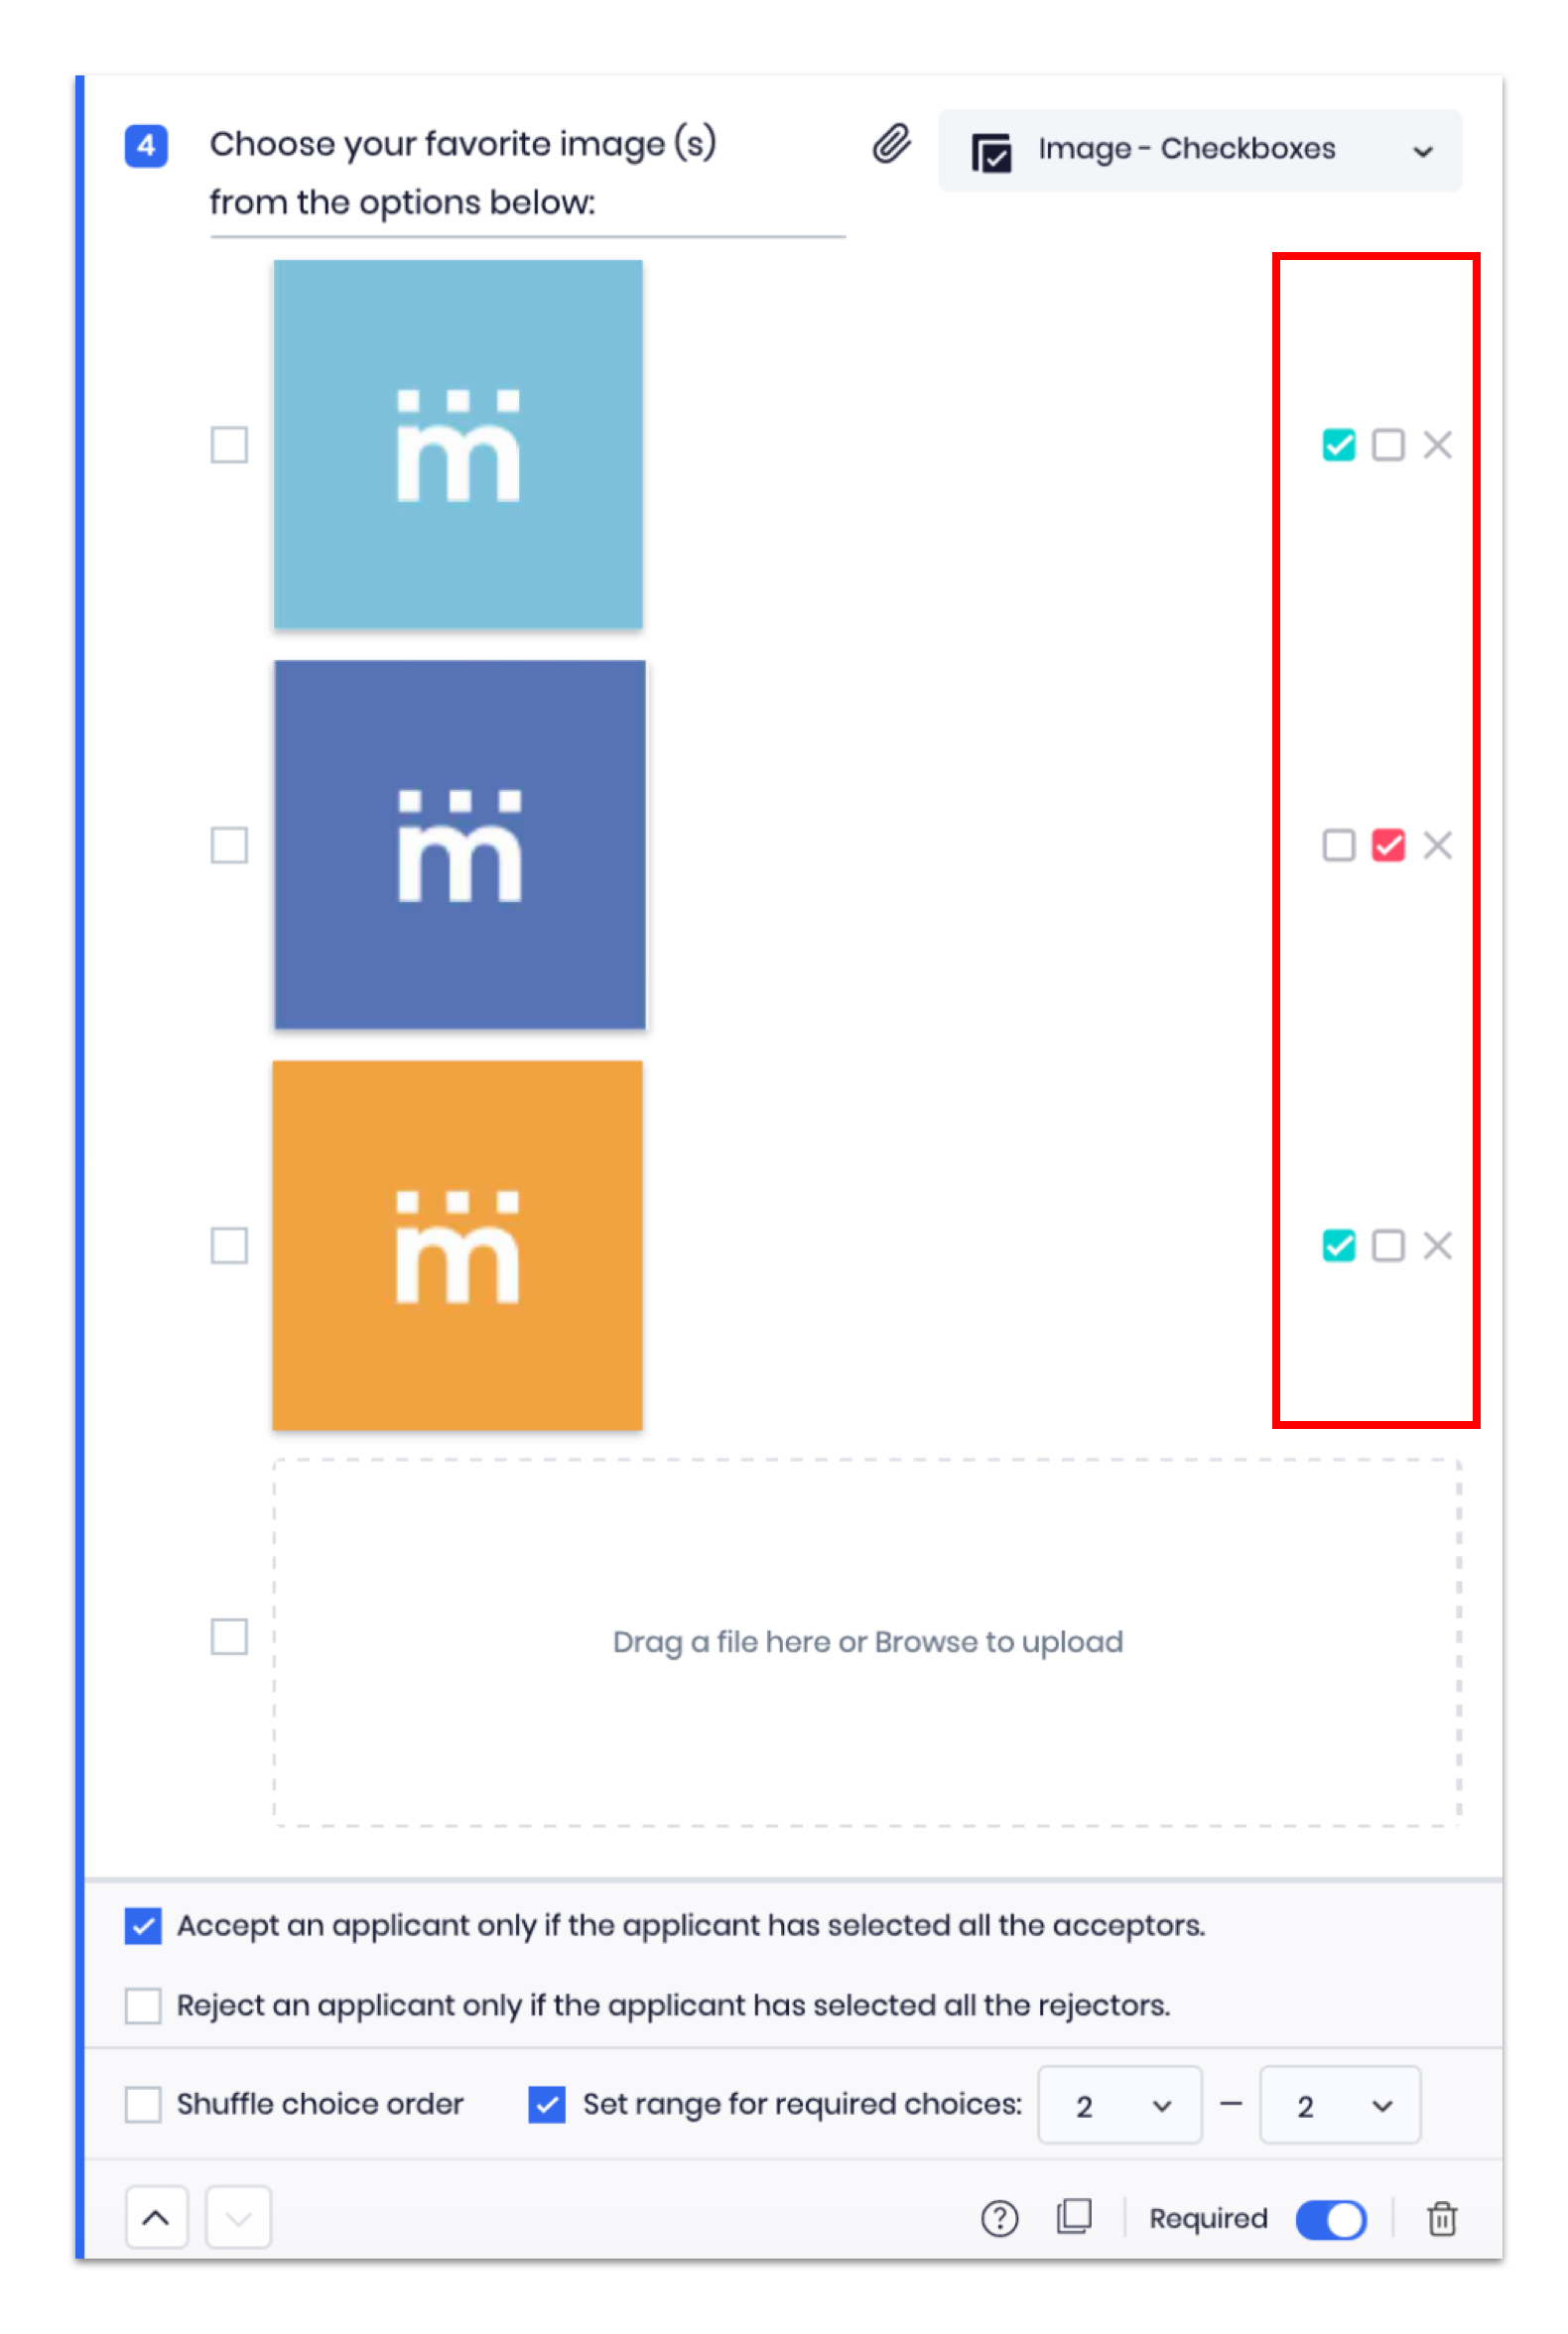
This question type asks respondents to select more than one image from a list of images provided.
To create an Image - Checkboxes question:
1. Select Image - Checkboxes.
2. Add the question text to the question field.
3. Drag one or more files into the dotted area or click on Browse to upload and choose the images you want to add.
- Screener Pack only: to add Acceptor and Rejector options to your checkboxes question, select the green checkmark option on the left (acceptor) or select the red checkmark option on the right (rejector). You can also choose to leave the selection empty.
 Note: Applicants are shown on the Recruitment > Applications page in your dashboard.
All of the applications can be found under “All”, independent of their answers. Applicants who have picked all "acceptor" answers (and no "rejector" answer) can be found under the Qualified tab, and applicants who have selected any "rejector" answers can be found under the Disqualified tab. You can also manually move participants to different tabs. Learn more about default and custom tabs and screener answers.
The tabs are there to help you organize your participants. An applicant being put under the Qualified tab doesn't mean that the person has been invited to the project. Learn more about inviting an applicant to participate in your project. - For Checkboxes questions only, you can program it to accept an applicant only if the applicant has selected all the acceptors and/or reject an applicant only if the applicant has selected all the rejectors by checking the corresponding option as shown below.

- To shuffle the order of choices, check the Shuffle choice order box. When this option is selected, applicants will see the choices shuffled on their end when answering the question.

- Check the Set range for required choices box and set the minimum and a maximum number of choices that applicants should choose.

For example, 2 - 3 means that an applicant would have to choose at least 2 and at most 3 choices.

Short Sentences
This question type asks respondents to provide a brief, single-line answer.
To create a Short Sentences question:
1. Select Short Sentences.
2. Add the question text to the question field.
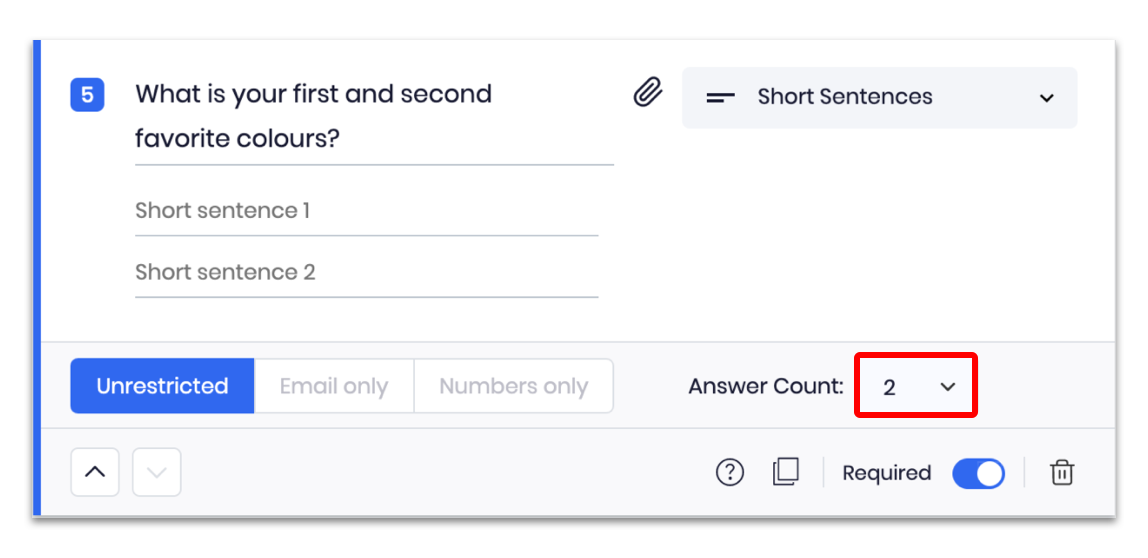
Select Unrestricted to allow applicants to enter any type of answers (letters, email, numbers).
Select Email only to force applicants to enter only answers containing email addresses.
Select Numbers only to force applicants to enter only answers with numbers.
- To add more fields, click on Answer Count and select the number of fields you desire.
Long Paragraph
This question type allows for a free-form answer that encourages a full and meaningful answer.
To create a Long Paragraph question:
1. Select Long Paragraph.
2. Add the question text to the question field.
-
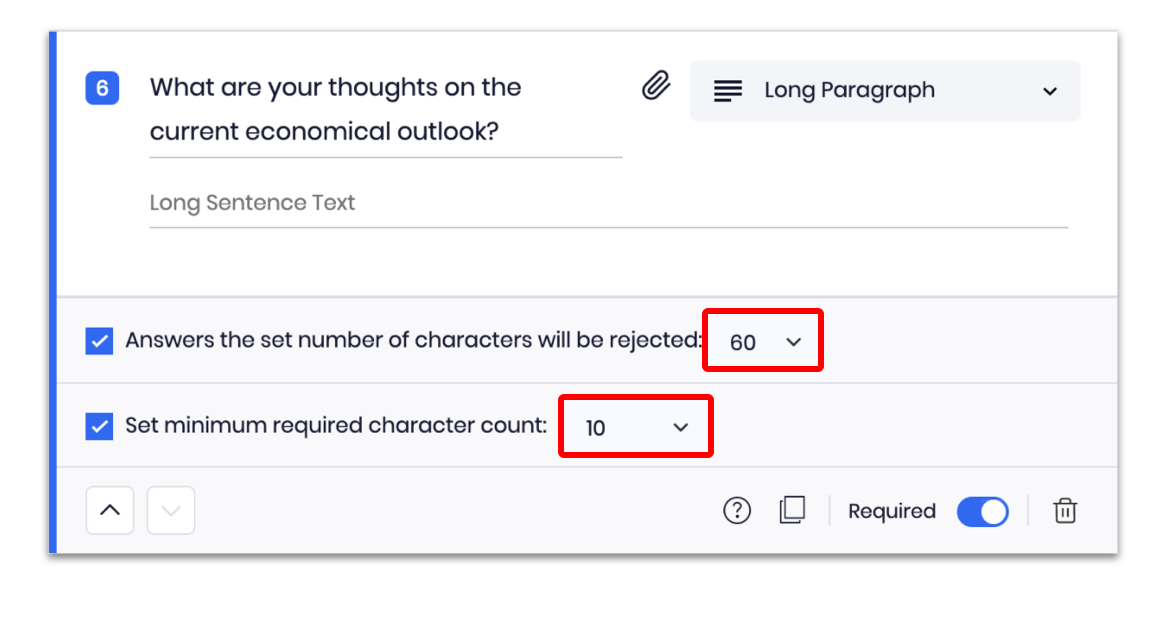
Screener Pack only: use the option Answers with the set number of characters will be rejected to reject answers that are too short. Applicants will still be able to submit the answer, but the application would be put in the Disqualified bucket if the answer is too short.
-
Screener Pack only: use the Set minimum required character count option to only allow answers that have more than the minimum amount of characters. Applicants won't be able to submit answers that don't have enough characters.
Scale - Opinion
This question type asks respondents to provide their level of agreement or disagreement with a particular statement on a rating scale provided.
To create a Scale - Opinion question:
1. Select Scale - Opinion.
2. Add the question text to the question field.

3. Input the text for each point label (low point, midpoint, highpoint).
-
Screener Pack only: select Reject the selected point to disqualify applicants who choose certain points on the scale. Click the dropdown selector to choose which points on the scale you want to add as rejectors.
Scale - Smiley
This question type asks respondents to provide their level of sentiment with a particular statement or question on a rating scale provided.
To create a Scale - Smiley question:
1. Select Scale - Smiley.
2. Add the question text to the question field.
3. Click the drop-down menu button to choose between a 3 Points and a 5 Points scale.
- Check the Use ‘0’ Value Scale box to make the scale start with 0 instead of 1.

Scale - Likert
This question type asks respondents to provide their level of agreement or disagreement with a particular statement on a rating scale provided.
To create a Scale - Likert question:
1. Select Scale - Likert.
2. Add the question text to the question field.
3. Click the dropdown-menu button to specify the number of points on the scale.
 4. Choose between a 5 and 7-Points scale.
Grid - Multiple Choice
This question type asks respondents to select one answer option (column) for each row in a table.
To create a Grid - Multiple Choice question:
1. Select Grid - Multiple Choice.
2. Add the question text to the question field. 3. Input the text for each Row and Column.
- Click on Add Row to add more rows or Add Column to add more columns.
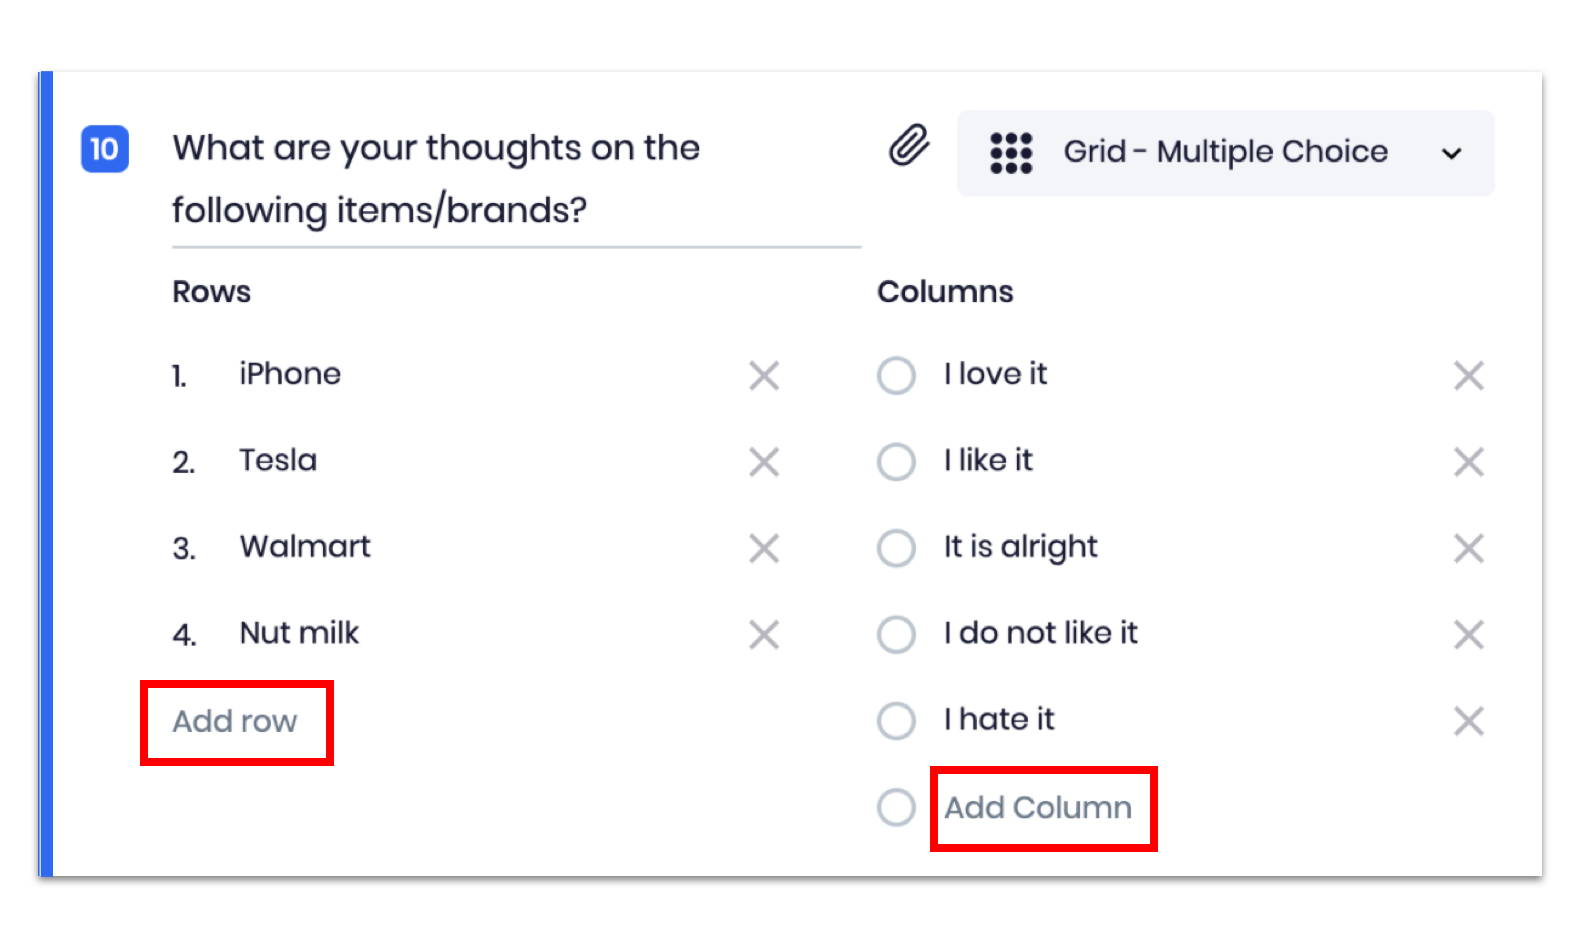
Pro tip: Click outside of the question editor to visualize how your participant will see the question.
Grid - Checkboxes
This question type asks respondents to select multiple answer options (columns) for each row in a table.
To create a Grid - Checkboxes question:
1. Select Grid - Checkboxes.
2. Add the question text to the question field.
3. Input the text for each Row and Column.
- Click on Add Row to add more rows or Add Column to add more columns.

Pro tip: Click outside of the question editor to visualize how your participant will see the question.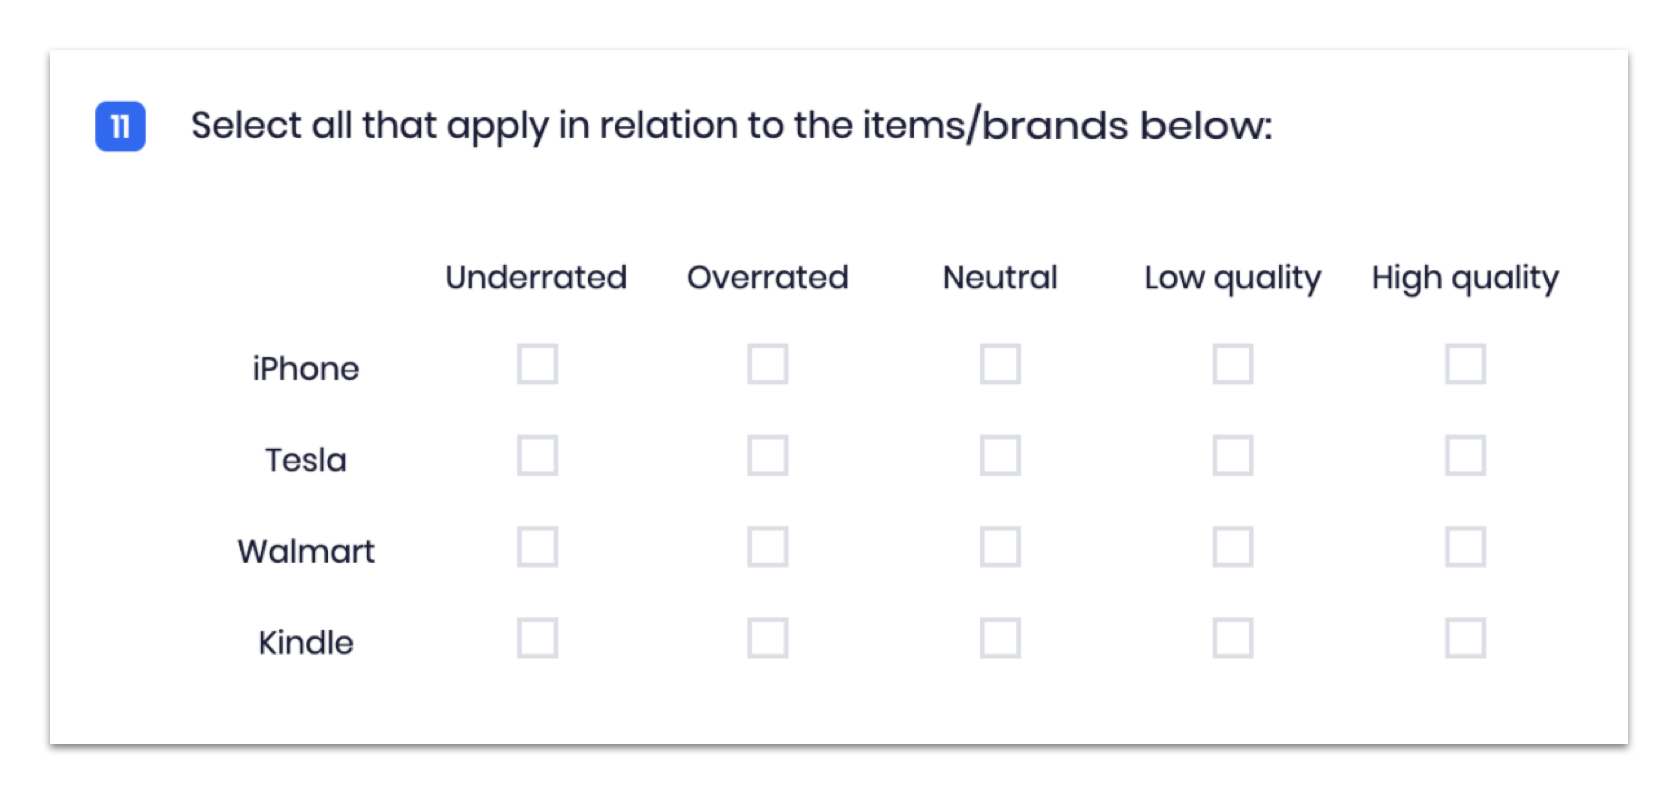
Ranking - Text
This question type asks respondents to rearrange options from top to bottom in order of their preference.
To create a Ranking - Text question:
1. Select Ranking - Text.
2. Add the question text to the question field.
3. Input the options for the respondents to rearrange.
4. Click on Add Choice to add a new option.
- To shuffle the order of choices, check the Shuffle choice order box. When this option is selected, applicants will see the choices shuffled on their end when answering the question.

Ranking - Image
This question type asks respondents to rearrange images from top to bottom in order of their preference.
To create a Ranking - Image question:
1. Select Ranking - Image.
2. Add the question text to the question field.
3. Drag one or more files onto the dotted area or click on Browse to upload to choose the images you want to add. 
Pro tip: to select multiple images at once, hold down the Shift key on the keyboard, and select all images you want to import as answers choices.
- To shuffle the choice order of your answers checkmark the box for Shuffle choice order. When this option is selected, participants will see the answers shuffled on their end when answering the survey.

Record - Video
This question type asks respondents to record and upload a video response.
To create a Record - Video question:
1. Select Record - Video.
2. Add the question text to the question field.
3. Click on the drop-down menu button to set the maximum length for the video recording.
- Click on the Set Transcription Locale drop-down menu to set the language setting the transcription service should use.

- Screener Pack only: check the An answer with a length less than the set time is rejected option and input the minimum length to automatically put applicants with answers shorter than the specified duration to the Disqualified tab.

Record - Voice
This question type asks respondents to record and upload a voice response.
To create a Record - Voice question:
1. Select Record - Voice.
2. Add the question text to the question field. 3. Click on the drop-down menu button to set the maximum length for the voice recording.
- Click on the Set Transcription Locale drop-down menu to set the language setting the transcription service should use.

- Screener Pack only: check the An answer with a length less than the set time is rejected option and input the minimum length to automatically put applicants with answers shorter than the specified duration to the Disqualified tab.

Image Upload
This question type asks respondents to upload an image.
To create an Image Upload question:
1. Select Image Upload.
2. Add the question text to the question field.
- Screener Pack only: Check the Applicants who skip this question will be rejected option to automatically put applicants who skip this question to the Disqualified tab.

Standalone image
To add a standalone image in-between questions:
1. Click on Add image as a standalone.
2. Select the image file you want to upload.
3. Click on Upload.
4. Add a text/instruction to the field Untitled Action.

Related articles
How to create screener sections and questions
How to create a survey
How to set up an app test survey
How to set up and edit recruitment details
Project applications
Screener answers and profile info of each applicant

Comments
0 comments
Please sign in to leave a comment.